

It is common for households to have more than one computers these days. Because of that, people want to be able to share files easily. Usually, people do this by sharing specific folders on their computer, but this requires one computer or another to be on. This is where the utility of a networked attached storage (NAS) device comes in. It is a central storage place that every computer on the network can access.
Today we will be looking at the Qnap TS 209 Pro II. This is meant for small/medium businesses, but can also be used in the home office as well. What is different with this product is that you will find it packed with many more features than just your standard NAS product. For example, you can use it as a media or web server. Or you can use it to download Bittorent files as well.
A Look at the Product
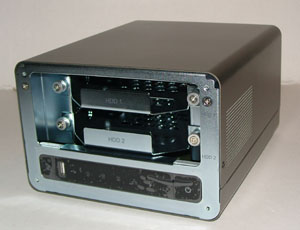
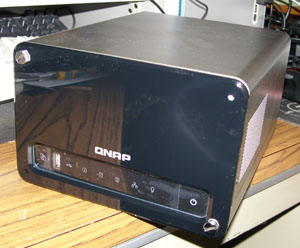
Looking at the product, you already get the sense that this product is of high quality. That is mainly because the enclosure of this product is aluminum as opposed to cheaper looking plastics. The product is rectangular, yet looks fairly compact. It can have two drive bays making it ideal to use a RAID configuration. The back of enclosure is flat with a visible fan in the back, a gigabit Ethernet port, 2 USB ports, and the AC adapter connector. Included with the product was the AC adapter used to power the NAS, an Ethernet cable, an installation CD, and small bag containing a bunch of screws.
 |
|

 Preparation
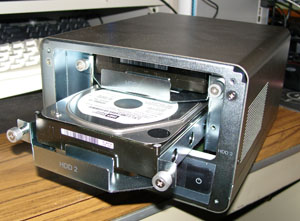
Before you can start to use the product, you need to install the drives. This product does not come with any hard drives, therefore you will need to purchase them separately. I used two 500 Gigabyte Seagate 7200 Serial ATA hard drives. Installing the drives is as simple as unscrewing the two screws on each side of the bay. I thought it was a nice touch that they are thumb screws and that you cannot lose them since they do not come off. After loosening the two thumb screws, I was able to remove the metal hard drive cage from the bay. Using the provided screws, you will need to secure the hard drive to the cage to prevent it from moving around. Then you can stick the cage back in with the drive. It should slide in easily. Then just tighten back the thumbscrews on each end of the drive bay to secure everything in place.
A cover has been provided to cover the hard drive bays. It is simply just a plastic piece that is placed in front. Then you use the provided screws to screw it in on all 4 corners.
 |
 |
After you have installed the hard drives, you have finished the physical part of the installation. You can then plug in the AC adapter and power on the product by pressing the power button in front at the bottom right corner.
Startup
When pressing the power button, the TS 209 Pro will make an initial beep sound. This is to acknowledge that the device is now booting up. After about a minute or less, it will make a 2nd beep noise indicating that it has booted up properly and is ready to be used. The noise from the NAS drive was reasonable. It was about the same noise as my desktop PC. If you plan on putting it in the same room that you sleep, you will definitely hear it, but is still fairly unobtrusive.
Software Installation
Installing the necessary software is as simple as inserting the provided CD. Then you choose to isntall the Qnap Finder. This is a tool that will allow your computer to see and connect to the TS 209 Pro II.
After the software is installed, you can run the Qnap Finder program. If the product is powered and running, you will see the device show up in the list and it will prompt you to configure it. I selected ‘Yes’ since I had not done it before and had put some fresh hard drives in it.

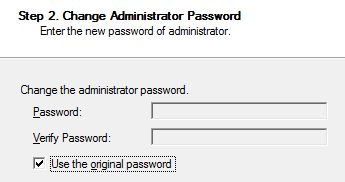
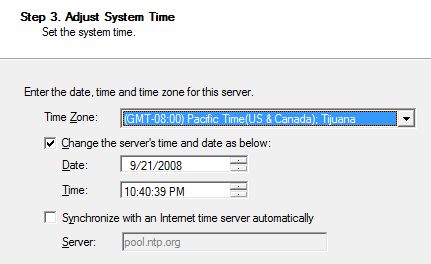
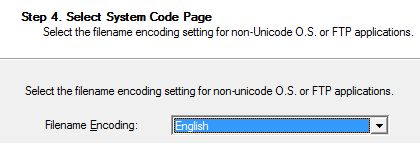
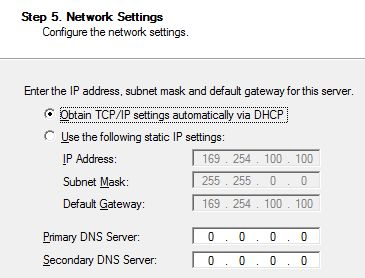
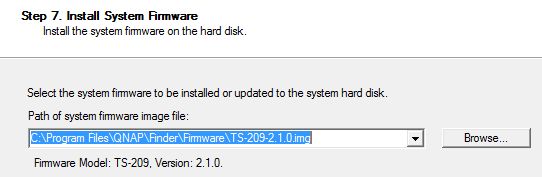
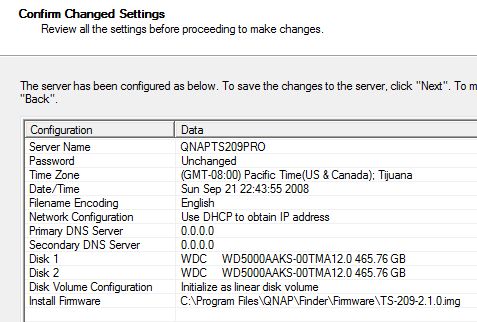
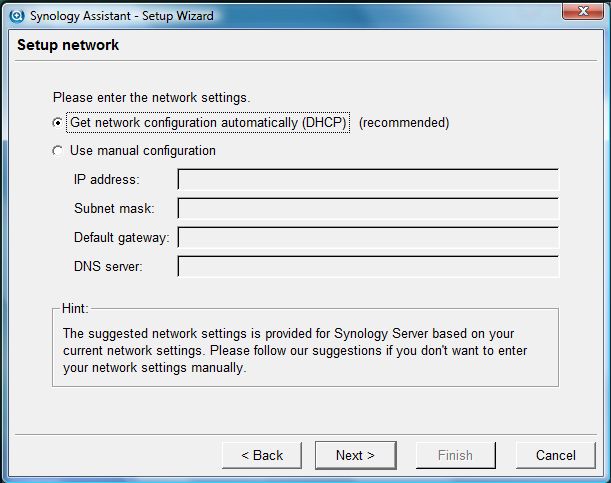
The first step is entering the server name. I left it as the default. Then you will be asked to assign a password used to access the NAS drive. I would highly recommend changing it. Then you will need to change the system time and date of the device. I didn’t have to touch those settings since it detected the correct time and date from my computer. The next step is to choose the filename encoding. The default is fine for the majority of users so I left the setting as is to English. Then you will have to configure the network settings. Most people will leave it to grab an IP address automatically, but this will depend on your network. Since I used some new hard drives, the next step involves the detection of the hard drives and initializing them. You can create a single disk volume, RAID0, RAID1, or a linear volume. Then you have to select the firmware version to use that will be installed on the hard drives. It automatically selected the path. Finally, you can review all the settings and let the software install. It will initialize all the settings and copy the necessary files to the hard drive to allow it to work properly with the NAS drive.

Using the TS 209 Pro II
The simplest way of accessing the settings of the TS 209 Pro II is by using the Qnap Finder software. Once you connect, it will open a web browser window and allow you to access specific features.
I’d have to say that the interface to the NAS drive is better than most. You may be a bit overwhelmed at first by the options, but you do get used it. There is a help feature that help explains what each button or option does so you aren’t left in the dark what each thing means.

Assiging specific groups and users is pretty simple. It is just a matter of point and click. You can make a group that can only access certain folders while another group having full access.

The menu of the NAS drive pretty much summarizes all the features that this product offers. You can setup a Networked File System, a FTP server, iTunes server, web server, etc.

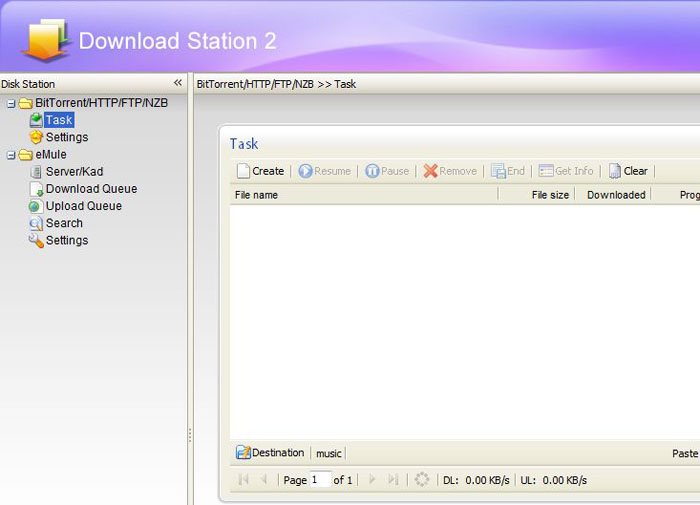
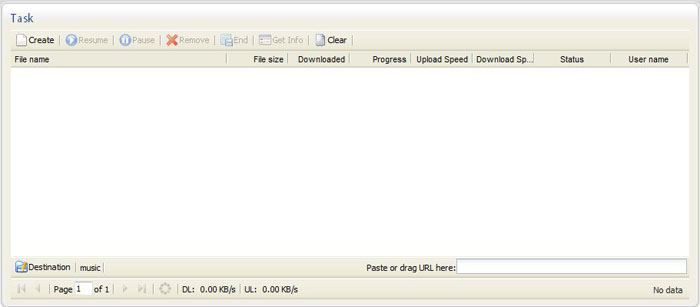
One of the features that I was very interested in was the Download Station feature. This is useful in the sense that if you are downloading a large file, you can have the Qnap TS 209 Pro download it instead so you don’t have to leave your computer on. I was able to generally download most Bittorent files successfully. You just simply locate the torrent file and it will start. For some reason, I was not able to download some Bittorent files. They just couldn’t connect to the tracker. This is a pretty basic bittorent client: you can schedule downloads and set the overall bandwidth to use, but that’s about it. When downloading, the download list will refresh in intervals showing the status.
With the Multimedia Station feature, you can allow the NAS drive to help organize your files so you can view them easily. For instance, if you were to put a bunch of pictures on the drive, you can view them like a photo gallery to find images quickly.
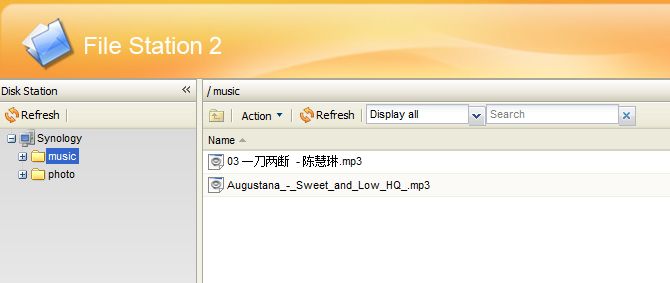
With the File Manager, you can see the files that are located in all the folders on the drive. I used this feature most when using the Bittorent feature. All the downloaded bittorent files were placed in a specific directory that was not public. Therefore, I used the file manager to quickly move the files to a different folder that was public.
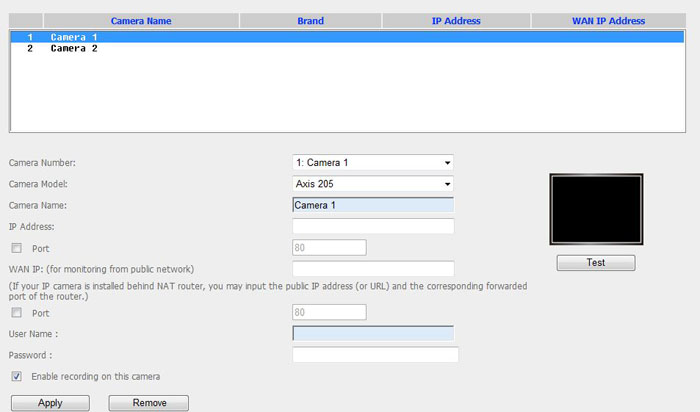
If you have an IP camera or two, you can also use this NAS drive to manage your cameras and enable recording. I didn’t have an IP camera on hand so I was not able to test this feature fully.

Conclusion
If you have a home office and want to take advantage of a few of the features mentioned in this review, then this product is for you. This product can be found on the Internet for under $400. If you plan on using this for storing files only, I would recommend a NAS drive with fewer options. But this is definitely worth it if you do more than just that. This product has set the standard for NAS drives and is something that all companies should offer at the least. I was impresed with the feature set of this product and would recommend this product.
Rating 8/10
