
 For most of my life I have only known one name associated with creating labels. A proprietary eponyms that is a four-letter D word (no no not that word ending in k). With thanks to Brother Australia, DRN gets to play with the Brother P-Touch Cube Pro (PT-P910BT) label printer, the latest mobile label printer to join Brother’s 36mm range.
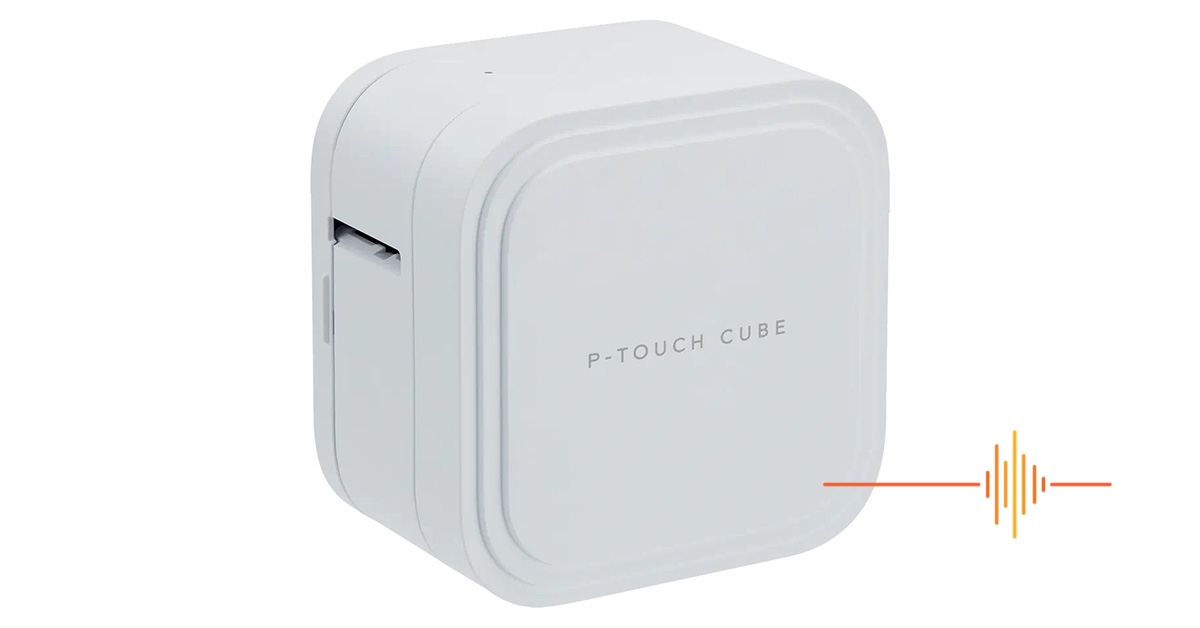
Unlike other branded label printers that I have been long accustomed to, the P-Touch Cube Pro is not an ergonomic (or even pretend ergonomic ) device for creating labels. As the name points out, it is (almost) a cube, a fairly hefty almost cube to be perfectly honest. What can it do you ask? Well it is capable of printing labels for anything up to 36mm wide, with the help of some software and tape cartridges.
First Impressions
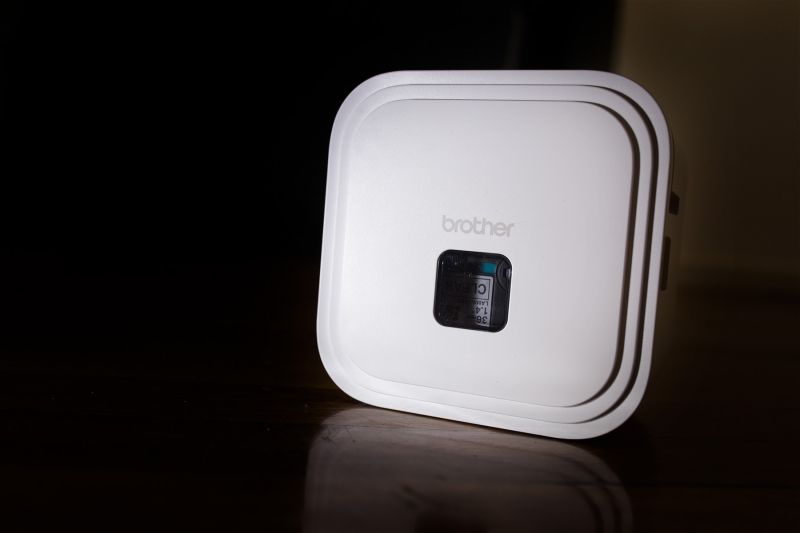
I was surprised by it’s weight, but it is a solid piece of machinery that feels like it is built to last. The Brother P-Touch Cube Pro comes in a matte finish white. It is not particularly grippy or slippery, I kind of worried about it slipping out of my hands by accident but it never even came close.
On one side the tape exit slot features prominently. The opposing side is a power button and USB-C charge port. Next to these is a handy little QR code directing you to download the P-Touch Design and Print 2 app. A single LED on top indicates the status of the P-Touch Cube Pro.
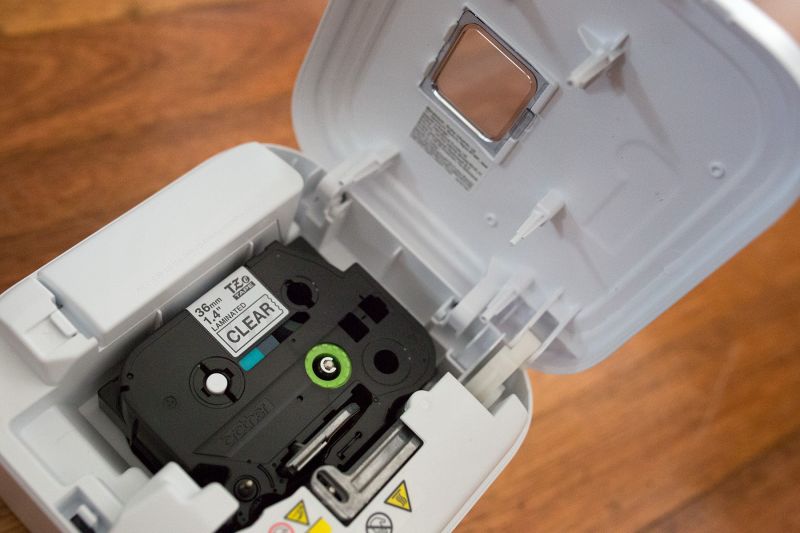 One side of the device opens up fully to allow easy replacement of the cartridge. The hinge feels sturdy enough to survive many replacements of tapes, and if you are going to label the world, you will be doing this to swap cartridges depend on your needs. I wouldn’t force the door beyond where it stops though, it is not flimsy but it certainly won’t end well. It does not look user replaceable either. But on the other hand, if you have the kind of people I deal with at work with prodigious tendencies to break things, then it is handy to note that the unit will still power on and work even when the door is not closed.
My review unit came with a Black text on White sample tape cartridge already pre-installed. Brother has certainly made things easy though, the cartridges will only go in one way. I purchased a Black text on Clear cartridge and it is as simple has having the information label facing up, align the two pins and flange and just drop it into place.
 Getting Started
Getting the P-Touch Cube Pro ready to work was an absolute breeze. I first started with the mobile app using both a Pixel 2XL and a 4XL. Make sure the Bluetooth is turned on, download the app and run through the setup wizard.
The app can be located via the QR code on the side of unit, or look for the P-Touch Design and Print 2 app in your appstore. Run through the EULA, it asks you to select a region, then goes onto starting the connection. If all goes well the P-Touch Cube Pro will appear in the next screen and all you have to do is select the device and you are ready to go. I gave this a few goes with a few different devices, connecting to the printer is easy as pie.
Interestingly enough the app does ask for location services rights when launched. When I queried Brother Australia on it, the answer was likely due to locality specific content that the app can retrieve from the server. I was not completely convinced of this answer which I will cover later.
In Use
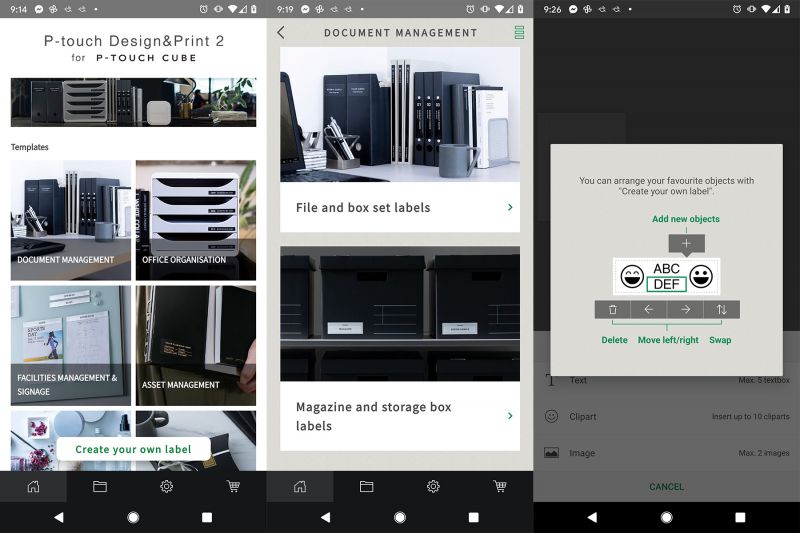
The app aims to make printing labels a snap with a variety of templates. They are broken down into the follow categories:
- Document Management
- Office Organisation
- Facilities Management & Signage
- Asset Management
- Shop & Retail
- Gifts & Entertainment
Within each of these are subcategories and different designs, with a sample to show you exactly what it will look like along with a recommendation of the type of tape to use to achieve the effect.
There is of course the option to create your own label, which allows for up to 5 text boxes, 10 cliparts or 2 images. The app provides ability to crop, rotate or resize your images. Images and clipart can be positioned on either side of text or each other. There are some limitations which are:
- no ability to text on image
- clipart cannot be rotated
- text orientation is fixed
 If you are thinking of using a template and “hack” it to fulfill a purpose, then you are going to be out of luck. Templates will allow you to change the elements existing in the template already. For example if it is a text template, you will not be able to add clipart or image to it.
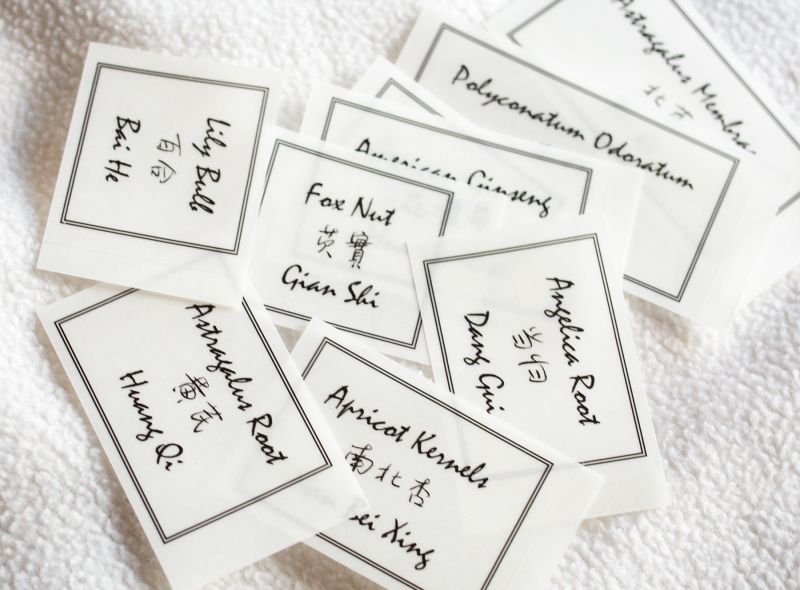
Handily the app has a scan function when you are entering text, and using the Google API to do translations. Mixing English and Chinese characters seems to confuse it somewhat, but I find that it is pretty accurate as long as I crop right down to the minimum amount text that I want in the one language.
The app allows you to save any designs you have made, and also keeps a history of any printed jobs, making it easy to go back and reprint or edit.
Desktop Software
There is a desktop version of the app called P-Touch Editor, which is available from the Brother website. In order to download it you have to submit the last 9 digits of the serial number. Whilst you are at it, grab the printer driver for the PT-P910BT because the software won’t run without it being present.
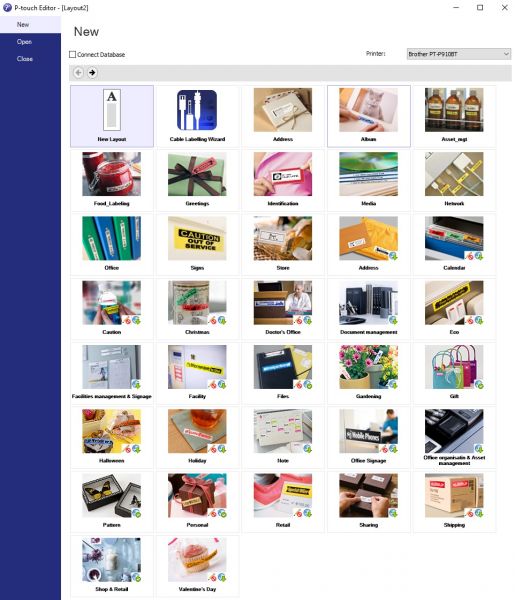
The P-Touch Editor comes with a lot more templates than the mobile version. Whereas the mobile version comes with 6 categories, the full blown desktop software comes with a whopping thirty-six! There is of course, the option to create your own layout which comes in the form of an express (simplified) option or professional. There are definitely pros and cons to both modes of label creation and I found myself swapping between the two modes to fine tune my labels.
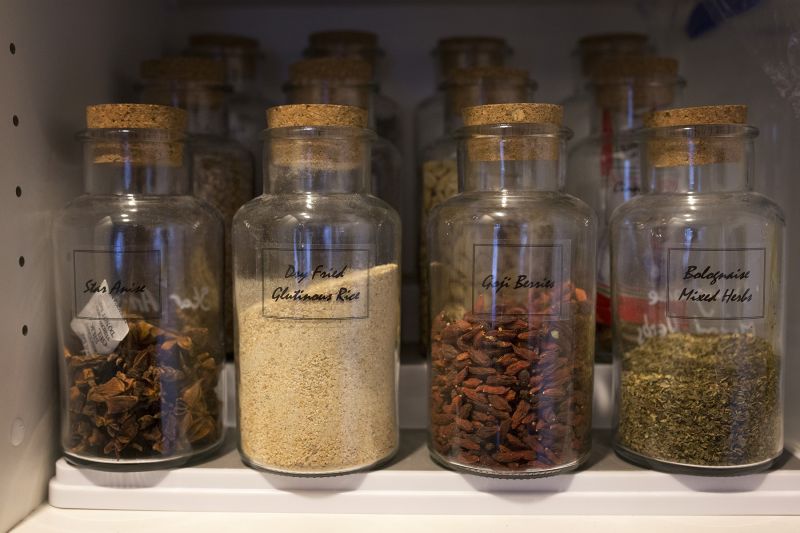
 There is a help file but hey, where’s the fun in RTFM right? It did take me some time to work the interface and come up with a workflow. Digressing a little, my partner has been rearranging her new kitchen for the umpteenth time when luck would have it, I get a label printer to review! So on my list of to-do was to run off a whole bunch of labels for various containers, bottles, you name it.
I could have gone with creating each label one by one, but that is time consuming and also quite wasteful in tape (more on this later). So I figured the best way was to sequence a whole bunch of labels and run them off in batches. And here is where the fun starts, learning the ins and out of P-Touch Editor on the fly. Admittedly it did not take me that long to figure it out, but it was not that intuitive at the start. Looking back it was logical if not intuitive, so here is the public service announcement.
When you first enter into the Express mode, a default blank label AND a blank text box is created. This is important to note – the text box is takes up the full size of the blank label. When you click on it, the sizing handles covers the full area and this hides the ability to manipulate the size of the label itself.
Now the height of the label is predetermined by the tapes offered by Brother, or you can tell the software to detect what is in the P-Touch Cube Pro at the time. The length of the label is what you have control over. If you just delete the blank text box at the start, then it is simple to extend the label to make it as long as you want up to 1 metre in length.
This brings me to tip number 2 – cut lines. You can ask the software to insert cutlines at regular intervals, or you can create them ad-hoc by right clicking, cutline, add. Alternatively, edit, cutline, throw in the position in mm of where you want the custom cut. If your intended cutline is outside the label length you have on your screen, then you are fresh out of luck and the software will change your input and throw a cutline in right at the end of where you label on screen ends. This was doing my head in for a while because I could not figure out why I could add 1 cutline and not add a second when I wanted to. Yes it is totally logical you can’t cut past where your label is finished and automatically cut by the machine. It was just not intuitive at the start particularly when the ability to resize the label is hidden by the blank text box.
To challenge number 3. My partner asked for a nice simple border around the label. This is easily added via the Frame button and a large amounts of pre-canned options are available. There is no options to import a frame as such, but it is possible to import an image and stretch it to suit. Using the P-Touch Editor (vis-a-vis the mobile app), you can superimpose text over an image.
 I did run into some issues with adding frames to labels. Because I was creating a batch of labels using the cutline feature, I wanted the frame to be created per label. However by default when you add a frame, the software creates it for the full size of the workspace, ignoring any cutlines. It is easy enough to drag the size back to where it is needed, but then you need to do this for every frame you need to add. By default, if you add multiple frames, the software will resize the pre-existing ones smaller to stop overlap. If you have created your frame and sized it to taste, you can lock the dimensions and position by right-click, property, expanded, and check the box for “Prevent Movement or Resizing With the Mouse or the Arrow Keys”.
So when you have sequenced 15 labels in a row, add each frame and lock them in place so you don’t have to go back and resize 14 labels at the end of the creation process.
It is important to note that you can create a label up to 1m in length, regardless of cutlines. You can slice the label like a sashimi master, or a single long label but that appears to be the limit.
I did run into problems with the P-Touch Editor in text formatting. After clarifying with Brother Australia support, it is a part carbon-based error. The software can create by default a fix sized text box and your input will be adjusted or wrapped around as needed. Alternatively you can create a free size text box where your text will continue on the single line. I have been inadvertently interchanging between the two and they can store separate “last use” values for font type, size, alignment etc.
Lastly a pro-life tip, turn on Bluetooth on your computer when you are setting up the driver for the PT-P910BT. Same goes when you are trying to print from the software. It was a long day in lockdown when I tried to run a batch of labels when the driver cracked a hissy fit. It took me a few minutes before I realised I had turned off the Bluetooth on my computer.
 Quality
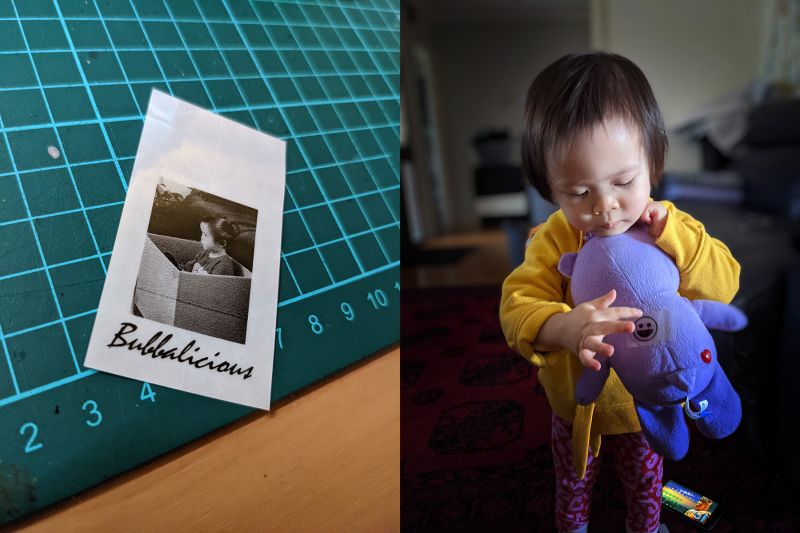
The print quality is excellent when it comes to simple clipart and text. Despite the 360 dpi resolution and monochrome limitations, it is surprisingly good when it comes to printing photographs. At the maximum size of 36mm wide, there is only so much you can do with it and even my 2.5 year old can recognise herself in the print out and loves it. Actually the moment she hears the printer fires up, she will be running around and waiting for it to spit out the labels.
The take away point here is that the printer is pretty quick, considering that that toddler are not the most patient of age groups, she is happy to wait for for the goodies.
Other Features
My review unit came all ready to use. My research shows that the battery is user removable and replaceable which is a definite bonus. Brother rates the battery to be good for up to 5 cartridges which is impressive. Cartridge capacity varies, but they come in sizes between 1.5m and 8m depending on purpose.
Charging only requires 0.5A of current so really any charger will do.
There is a “mail-merge” like function on the P-Touch Editor where you can populate text fields from an Address Book or data files. You will need to understand how to connect to a database, be it an MS Access (shudder), or Excel files or CSV. Alternatively you can also connect to a SQL database but you will need a little knowledge on creating ODBC connections for that.
For those without a Bluetooth connection on your computer, you can use it as a USB printer.
The end of the cartridge is obvious, there is about 8cm of zebra stripes, shortly after the cartridge makes an awful sound as the winder locks and gets dragged along.
Tapes and Options
Brother offers a variety of tape types in heights of: 3.5mm, 6mm, 9mm, 12mm, 18mm, 24mm and 36mm. Not all types of tapes come in all the different heights.
Types of tapes compatible with the P-Touch Cube Pro are:
- Standard laminated – this is what I have tested to date and it is surviving the onslaught of an enthusiastic toddler
- Fluorescent laminated – for all your bright colours
- Matt laminated and non-laminated
- Flexible ID
- Strong adhesive
- Acid free adhesive
- Iron on fabric
- Tamper evident laminated
- Heat shrink tube
- Deco / pattern laminated
- Ribbon non adhesive and non-laminated
- Premium laminated (metallic colours)
The full Australian tape options are listed here.
 Gripes
My main gripe with the P-Touch Cube Pro is wastage. For each individual label I create and print, there is a 2cm leading edge wastage. When I changed it to a sequence of multiple labels, yes there is still a single 2cm leading wastage, but more importantly, there is only a 0.5cm wastage in between each label. So whilst the largest cartridge is 8m, printing lots of single shot labels you will end up wasting a fair bit of tape.
Given the portable nature of the unit, a little protective carry case would be a nice touch.
Last of my gripes, is that not all the tapes are available in Australia. My partner really wanted the 36mm White on Clear (TZe-M65) which was a recommended one based on the Bath Salts template, but the only place I could find them is in … Ireland. Here is where I got a bit sceptical on the location access rights, and sculling a Guinness in Melbourne wasn’t going to get me in the spirits of things.
Wishlist
Given the P-Touch Cube Pro is billed as a portable device and the app requests location permission, it is a missed opportunity for Brother to implement a “Find My Device” capability in the app.
The mobile app could be better with more controls on a freestyle label creation. Something like text orientation and text overlay on image will make it more flexible without resorting to the desktop version.
 Conclusions
The Brother P-Touch Cube Pro (PT-P910BT) is a solid label maker that is really designed to cater to commercial and professional spaces that require highly durable and customisable quality labels, anywhere, anytime, using smart phone or desktop devices. There is a lot of potential and whilst I initially thought the software was letting it down, having clarified with Brother Australia I understand the interface a lot better and I have detailed it above.
The large variety of tape you can get makes it a very useful tool. The ability to personalise ribbons is handy for someone who wants the gift wrapping to be as thoughtful as the gift itself. That said it seems the 1m length limitation is across all types of tape so you may need to be creative there.
I know right now in Melbourne, additional business expenses is the last thing anyone wants but I can assure you that a good label printer is going to be needed when the state government finally decides that QR codes for contact tracing is a better option than scribbling your contact details on a piece of paper. Obviously we have been partying like it’s 1930s with László Bíró and I am mildly surprise the Victorian Government hasn’t stockpiled clay tablets. Don’t even get me started on privacy issues and the government’s excuses on why our contact tracing is a dog’s breakfast.
The Brother P-Touch Cube Pro (PT-P910BT) costs AUD$549 which does not make it a cheap proposition. Be prepared to invest a little time and wastage at the start, but it is certainly versatile and should last a very long time particularly with a user replaceable battery.
Stay tuned as we will follow up on this review once we get our hands on some new tape.
Specs
Media Type : TZe tape
Available Tape Widths: 3.5, 6, 9, 12, 18, 24, 36mm
Dimension (Width X Depth X Height) : 138 mm x 94 mm x 138 mm
Weight: 1.05 kg
Print Output
Print Resolution : 360 dpi /560 dots
Print Speed : 20mm/sec
Media
Tape Cassette: Up to 36 mm
Functions
Cutter: Auto (Full Cut/Half Cut)
