
Gather around readers, I am going to write about the Connect Smart Deadbolt with Fingerprint (CSH-DEDBLTBIO). This one has taken me a bit longer with a bit of work to review. So how did it go overall?


First Impressions
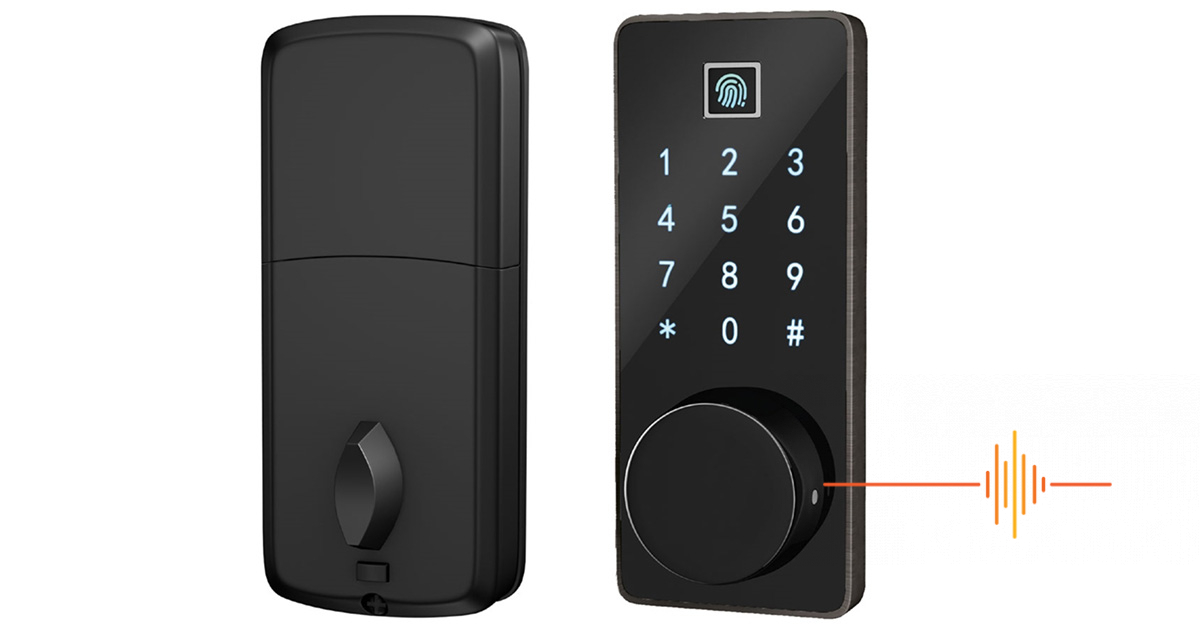
There is no mistaking the Connect Smart Deadbolt with Fingerprint. It’s a fair sized device to accommodate a fingerprint reader, a numeric keypad and a physical key unlocking mechanism. For what it is, the outside facing part is fairly slim and the bulge hiding the keylock can double as a handle to pull the door shut.
The inside part is thicker, having to accommodate 4AA sized batteries as well as all the electronic and physical mechanisms to drive the operation of the lock.
The instructions comes with a template to make all the necessary cuts and drilling for the door and the door jam. It is designed to be able to interchange with a standard lock with minimal fuss.
Installation
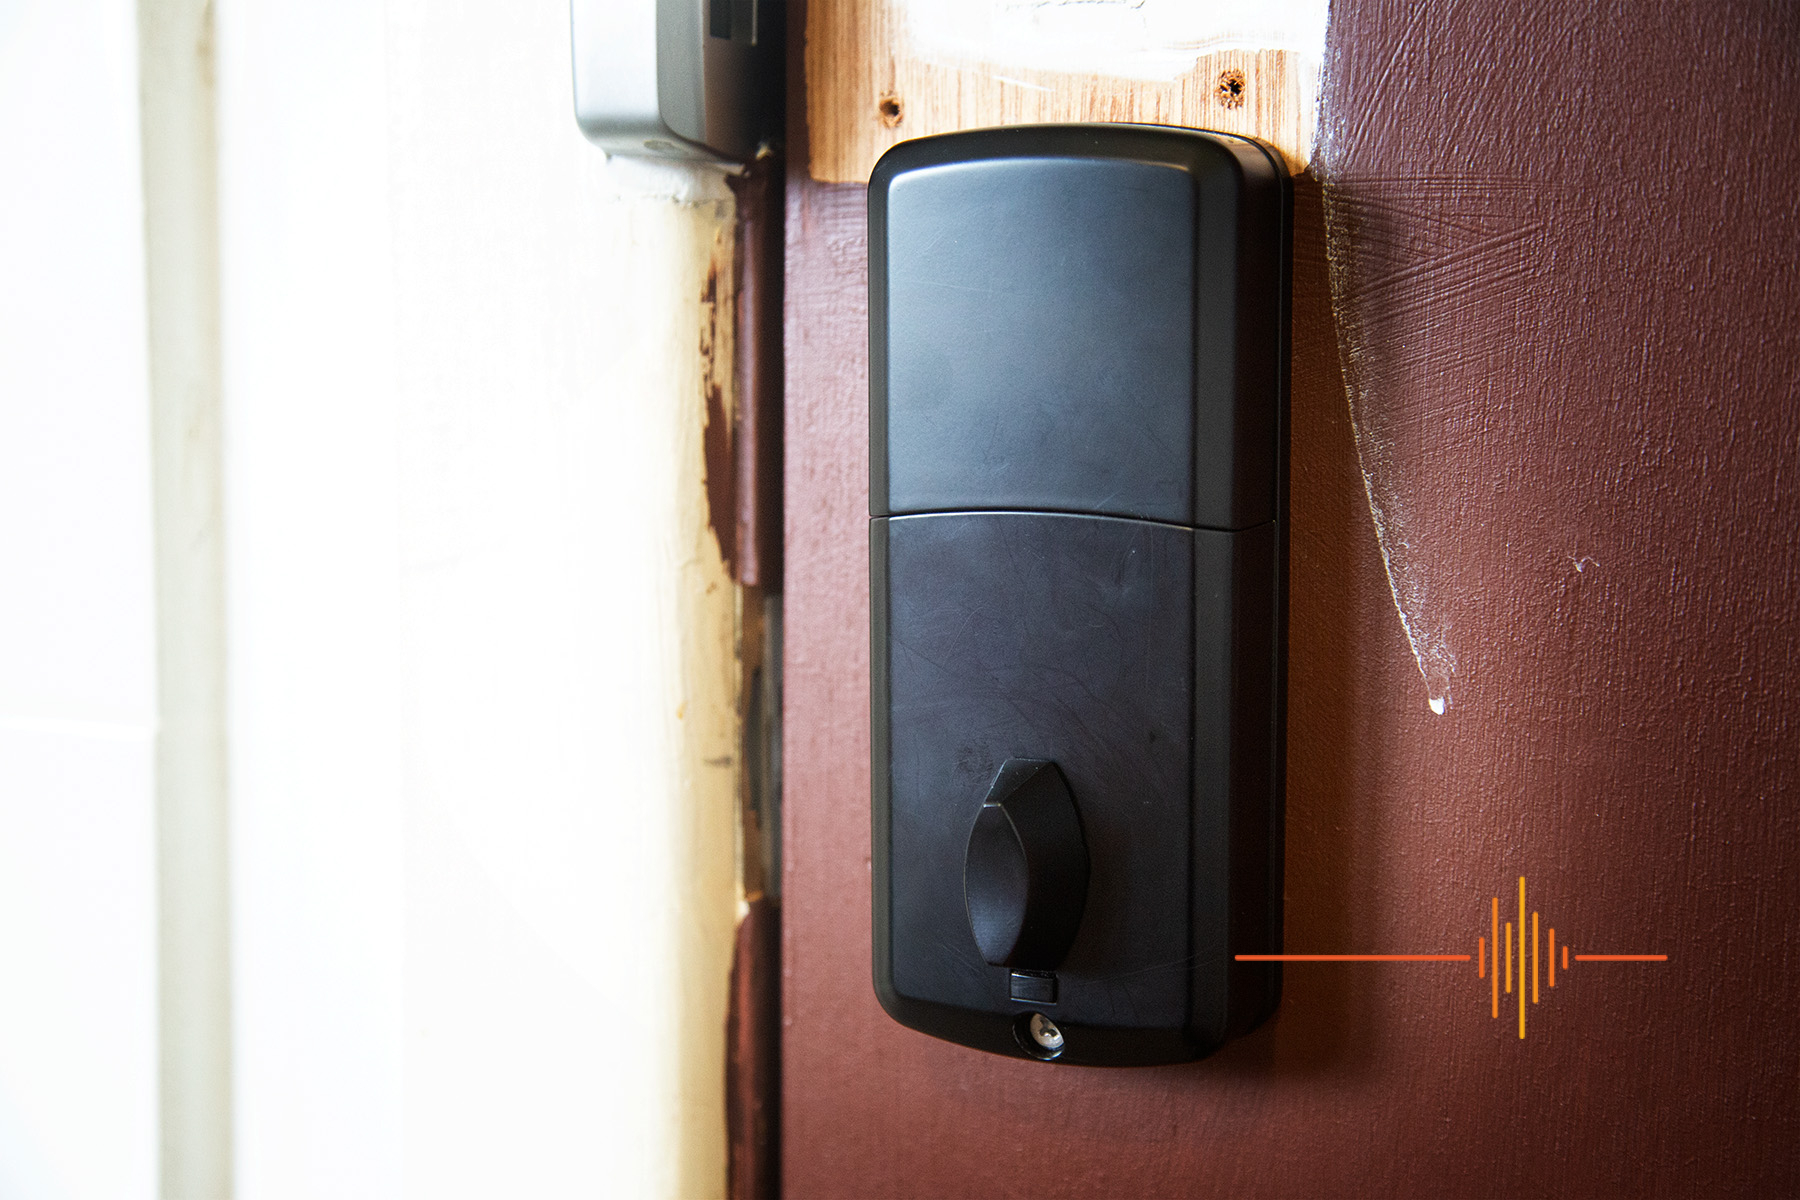
I picked my laundry door for the installation of the Smart Deadbolt. I was not quite ready to put a smart lock on the front door but the experience of locking myself out of the house with my toddler means it was time to invest in the technology.
This door had a pre-existing deadbolt and a separate door knob. So in order to fit out the Smart Deadbolt, I had to remove all of that first to make room.
As much as it looked simple to install, the instructions were a bit skinny on the details. The template works, you just mark off where to drill and make the appropriately sized opening which is all clearly documented.
I ran into problems with the length of the cable which was a little on the short side, and then I really ran into problems getting the deadbolt to retract. Eventually after a fair bit of playing around, I finally figured out that the piece of metal that drives the deadbolt needs to be installed in the horizontal position and not the vertical as I had it. Once I rotated that into the correct orientation, things were looking up. After that it was just a matter of getting the wire out of the way and hidden, tighten all the screws and start with the configuration.
Because I had two existing holes in the door previously; a very liberal amount of putty was applied to close it up.


In Use
As an existing user of the Connect Smart app, the pairing of the Smart Deadbolt to the app was remarkably straightforward. Steps 2 to 5 of the instructions gives you a nice bouncing ball to follow. I had zero issues getting the door paired with the app (and I had to do it a few times actually). There are voice prompts to guide you though the various processes, but having the instructions on hand does make it simpler .. kind of.
First thing you do is change the super administrator passcode. No excuses. Just do it. It is step 1 in the instructions.
At this point the Smart Deadbolt is functional, you can generate a remote dynamic password which will last for 5 minutes and allow you to unlock the door.
Obviously we do want to set up permanent users on the device and this took me a bit more work.
The instructions give you the steps to add administrator accounts, which is limited to 2. This is for Smart Keycard admin and Fingerprint admin. You can have up to 5 normal users although the specifications also states that you can have up to 200 users with combinations of using passcode, card and fingerprint.
The Smart Deadbolt can be used in single or double user mode. Single user mode requires only the 1 access type – passcode, fingerprint OR card. Double user mode requires two types of authentication – a combination of passcode + fingerprint for example. This can be changed at any time, but take care to ensure you do have multiple authentication for each user before switching to double user mode. Also this is an all or nothing deal, you cannot have some users requiring double authentication and some on single.
Adding normal users is relatively straight forward, particularly when it comes to passcode. You need to key it in twice to confirm. Passcodes have to be unique as well, you cannot enter the same passcode twice and create separate accounts. The Smart Deadlock will inform you with an error message if you try.
The same method can be used to add fingerprints and keycards. Included in the package is 2 keycards. Sadly the NFC on my Pixel 5 is not recognised by the Smart Deadbolt.
Other useful features to mention here include automatic lock mode, where the Smart Deadbolt will lock the door after a preset time between 1 to 99 seconds. This can be handy if you are forgetful, although it does need a door that is fairly level and does not become ajar of it’s own accord like mine can do. If you don’t use the automatic lock feature, you can manually trigger the lock by pressing the # key.
The App
Do not get seduced by the options in the app, there are dragons in there.
For starters, create the users via the Smart Deadbolt by following the instructions. Take note of the User ID the voice prompt feeds back once created. For example with the first passcode you may be told User ID 18. Then add the fingerprint and it’ll be User ID 19.
After that, you go into the Connect Smart app and create a user – either in the “Family” group which will give the user control and use all products in the home group, or “Other” which means they can use the device but can’t change anything. Once you have done that, you will see “Unbound” next to the user meaning there is no User ID assigned to it. This is where you edit the user and add the relevant User ID to the fields. So for example User ID 18 for passcode for user Kevin, and 19 for fingerprint for user Kevin. Repeat for the process for all users.
I created the Users in the app in anticipation, then added everyone’s passcode and fingerprint at the door. After each user I assigned the User ID to their names so I have meaningful logs to look at. You don’t have to assign a name to the User ID, the Smart Deadbolt will still work but looking at the logs and just a bunch of numbers makes it hard to figure out who is accessing the house and when.


Other Features
If you are like me and have a teenager who doesn’t remember to take his keys and runs his phone down until it dies, a remote unlock request can be initiated with a 888# on the keypad. This sends a request to the Connect Smart app and if actioned within 90 seconds, can remotely unlock the door without needing to input a code.
You can also create up to 10 temporary users with a passcode and a start/end time period for each code to be valid.
After three failed attempts to login, the Smart Deadbolt will trigger an alarm and lock all functionality for 1 minute. The only override during this time is using the physical key.
The Smart Deadbolt is powered by 4 x AA sized batteries, there is a micro-USB port at the bottom of the device to provide emergency power.
Lastly, as a habit before doing to bed, I press the “Double Lock” button at the bottom of the lock to disable access to everyone except the Super Administrator.
Gripes
Unfortunately, I do have a few. The administrative experience was an exercise in frustration and I have had to factory reset the unit once, wipe all users a few times and start all over again.
I had to factory wipe the device when I somehow managed to disable the keypad so that it no longer wakes up and accept commands. And because my fingerprint was no longer on the system, I could not get in that way either. In the end it was a matter of pulling the unit off and hitting the reset button and start again.
Adding users was very inconsistent. I had no issues adding passcodes for users but when it came to adding fingerprints, it kept overriding my fingerprint on my User ID. A few times it worked and added as a separate users, and quite a number of times it wiped out my record. I did get it working in the end but it was more by luck rather than anything else.
I have been completely unsuccessful to set up different administrators, it keeps overwriting user ID 0’s PIN when I try.
The fingerprint reader can be quite picky, you need to emulate the same orientation as how you registered the print to get a consistent read.
The remote unlock request did not pop up a notification on my phone, and did not always show up in the app either.
Temporary user never worked for me. I am forever stuck in “syncing” until it times out and goes into “invalid” mode.
There is no detection for metal or door frame with the bolt. The app can report that the door is locked in the sense that the bolt has returned to the lock position, but the door can be wide open.
Conclusions
I feel mixed about the Connect Smart Deadbolt with Fingerprint. I don’t love it and I don’t hate it. The instructions are too simplistic and really undersold how complex the process could be. But through persistence and trial and error, I have managed to get it running, and I had to because of the major surgery I did to my door to get it installed.
Now that I have all the key users set up with the various types of authentication, I feel happier with it. My partner is ambivalent to it but will be happier when I get go to Bunnings and get a door handle so she can pull the door shut properly.
The Connect Smart Deadbolt with Fingerprint (CSH-DEDBLTBIO) has a RRP of AUD$249.95 and to be honest, I expected something more robust and refined. The process took far longer than it should have particularly given my experience in testing products.
DRN would like to thank Connect for their on-going support.
Specifications
SKU: CSH-DEDBLTBIO
Fingerprint Reader: Y
Smart Card: Y
Packaging Dimensions: 11 x 20 x 22
Android / IOS App: Connect smartHome
Passcode: Y
Physical Key: Y
Bolt Dimensions: 60mm
History: Y
Power : 4 x AA Batteries (not included)
Battery Life: Up to 8 months (if used 8 times a day).
Temporary User: Y
New & Retrofit Installation: Y
Warranty: 12 Months
Notifications: Y
Weight: 2.0kg
