
 By 2018, it has been estimated that we will be producing upwards of 50TB of data every second.
With its eight internal bays and huge expandability, Synology’s new DS1817+ NAS is ready to do its part.. and more.
Read on for our DS1817+ review.
The DS1817+ is Synology’s latest Network Attached Storage (NAS) device and a descendant of the DS1812+ we reviewed five years ago. Back then hard drives maxed out at 4TB giving the DS1812+ a respectable 32TB of internal storage. With 10TB drives now readily available, the new DS1817+ can store a massive 80TB internally and up to 180TB when connected to two five bay extension units!
UNBOXING
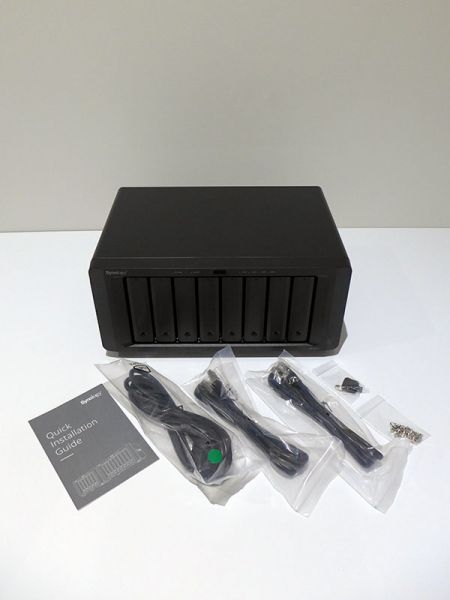 The DS1817+ comes neatly packaged with a region specific (Australian, in our sample) power cable, two CAT5E Ethernet cables, two drive bay keys and a bag of mounting screws for 2.5” drives. As always, Synology also includes a pictorial Quick Start Guide which considering the abilities of the hardware, is very easy and simple to follow.
The DS1817+ itself is a sturdy unit, weighing in at 6kg with empty drive bays and standing on its four rubber feet, gives it a total height of 166mm. The DS1817+ is 343mm wide and 243mm deep which considering its eight bays isn’t an unreasonable footprint for a NAS.
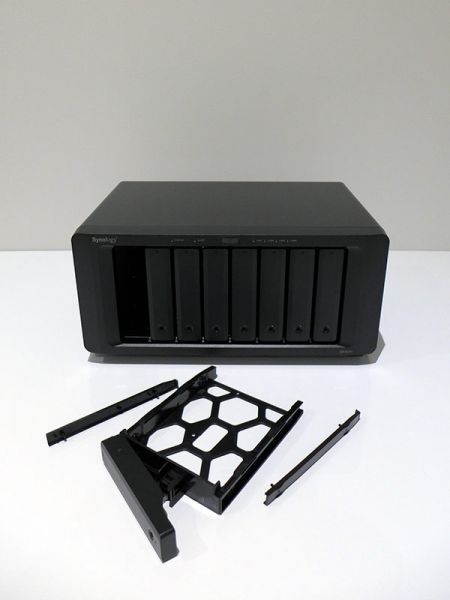
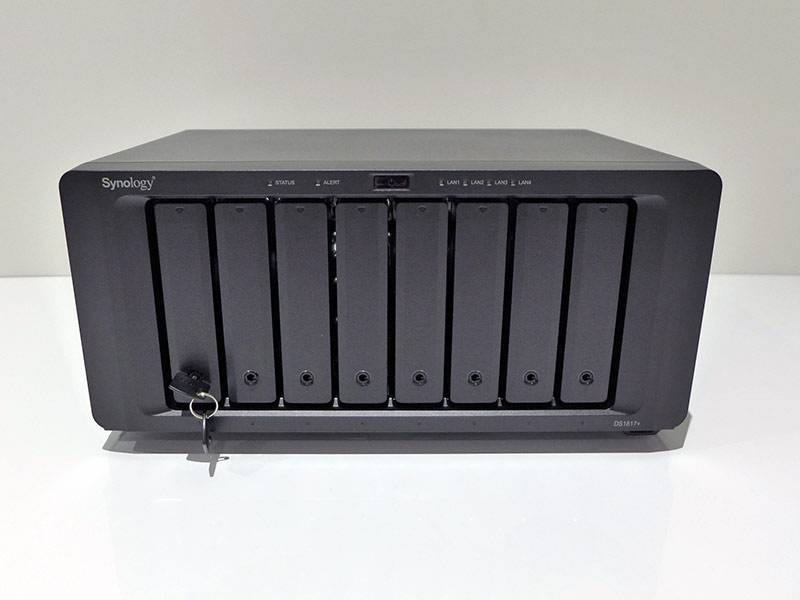 As with most of Synology’s NAS devices, the front is dominated by the drive bays: Eight bays are lined up vertically, each with its own triangular LED access light and also it’s own individual hexagonal lock mechanism. Beneath the drive bays is a small embossed identifier (1-8) while above is a centrally located power button. To the left of the power button are status and alert LEDs while to the right are four LAN indicators. Also included on the bottom right hand side is a blue colour coded USB 3.0 connector. While its low and recessed location makes it somewhat difficult to access, the inclusion of a front USB 3.0 port is welcomed.
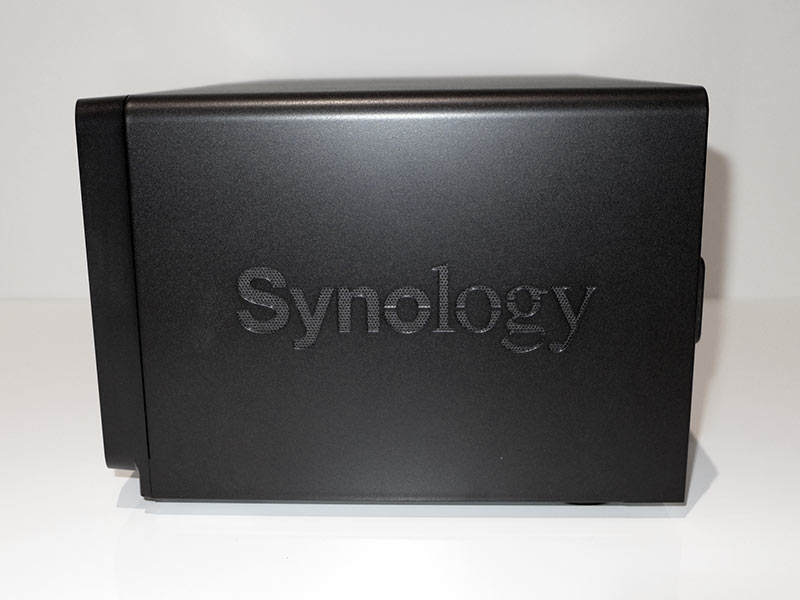
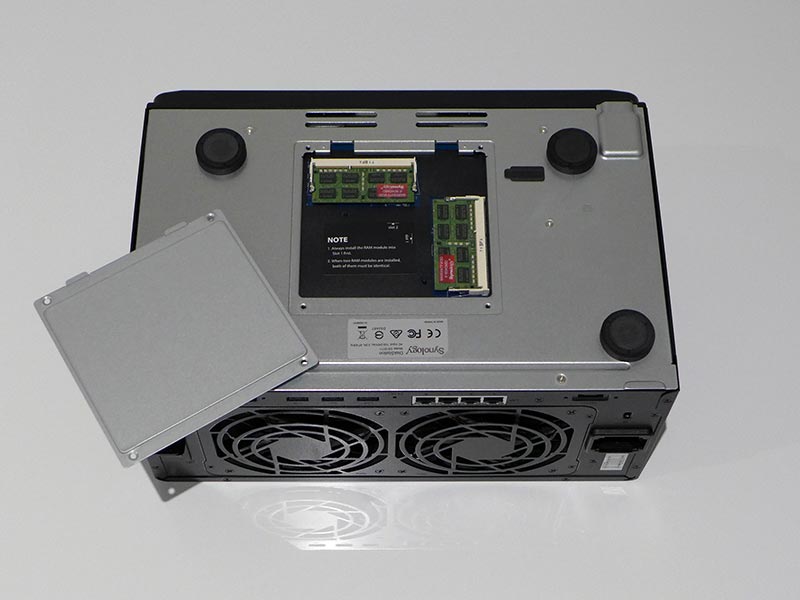
The sides of the DS1817+ continue to feature Synology’s cutout venting which looks neat and the top again, remains unremarkable. Quick access to RAM is available via a small door on the bottom of the unit. Having been supplied with a 16GB RAM DDR3L 1600 upgrade kit, we removed the cover and quickly replaced the standard 2GB stick with the two 8GB sticks. This process was very quick and simple, as it should be. The bottom of the DS1817+ also has a rubber covered console port but is otherwise unremarkable.
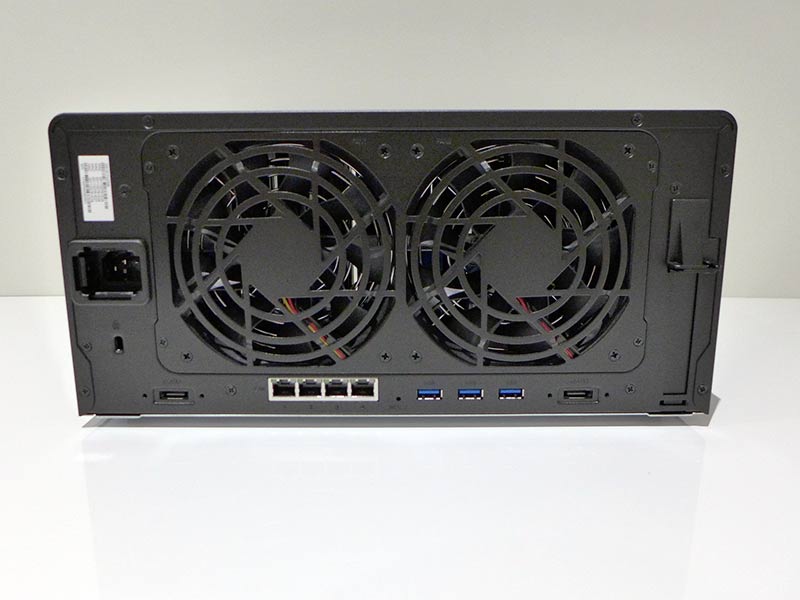 The rear of the unit is dominated by two 14cm exhaust fans which are surrounded by a multitude of ports and connection options. Underneath the fans are four Gigabit LAN ports and three USB 3.0 ports: No more USB 2.0! Two eSATA ports are also included for connecting up to two of Synology’s 5 Bay DX517 expansion units. To the right is a three prong power connector and also a standard Kensington lock slot. To the right of the two large fans is a PCIe expansion slot.
While its great to see USB 2.0 finally being dropped, we wonder how long it will be until we see USB-C make an appearance.
SETUP AND USAGE
We were happy to see that Synology has stuck with their clever screwless HDD drive bays: Once unclicking the individual drive bays side rails, standard 3.5” hard drives simply slide in with the rails clicking back into place, holding drives in securely. While this screwless system is excellent for full size drives, it is worth nothing that for smaller 2.5” drives, Synology supplies a bag of screws for more traditional fitting.
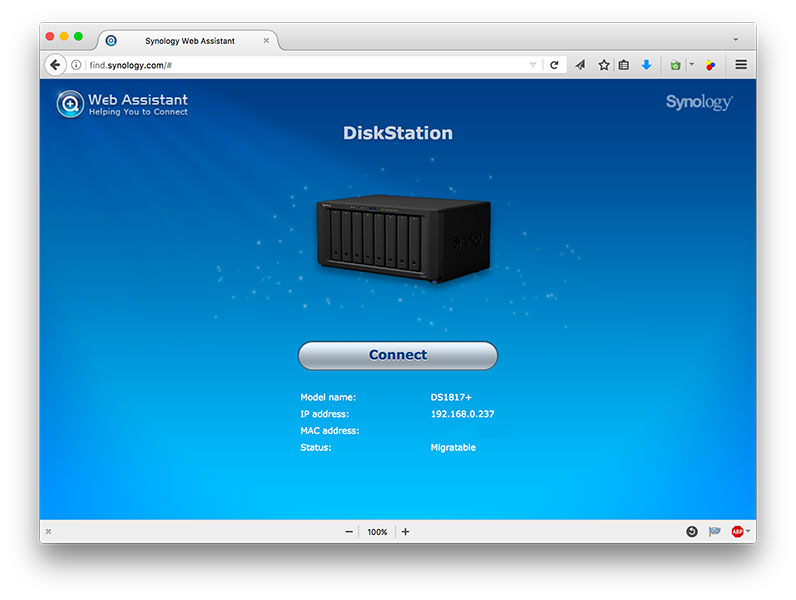 For testing, we installed two Western Digital 500GB RE2 7200RPM Hard drives and connected the DS1817+ to our live Gigabit Network. Following the included Quick Start Guide, we used a browser to access the Synology Web Assistant at <http://find.synology.com>. After allowing the DS1817+ to fire up, the Web Assistant automagically located the DS1817+ on our network and was ready to connect.
As the two drives we installed were previously used on a DS715, the Synology Web Assistant prompted us to ask if we wanted to migrate the data (and settings). While we wanted to do a clean install, we thought it would be prudent to see if the data would migrate, so we took up the Web Assistant’s offer and migrated our settings and data.
 Within about twenty minutes the DS1817+ had installed the latest Disk Station Manager software, applied our original DS715 settings and rebooted. The data from our previous RAID 0 array on the DS715 was all available and in perfect working order. Neat.
After checking the existing data, we decided the best way to test the DS1817+ was to do a clean install so we did a Factory Reset via the DSM’s control panel.
Once the DS1817+ had rebooted, we used the Synology Web Assistant to perform a clean install. The DS1817+ once again went through its roughly 20 minute cycle of downloading the new DSM and setting things up so that it was ready to use. Once ready, we used the DS1817+’s DSM to create a Btrfs Synology Hybrid Array (SHR) array which included one disk fault tolerance – essentially creating a RAID 0 disk array. We also scrubbed the disks with a Parity Consistency Check which took a few hours to ensure our disks were in good order.
Overall, Synology’s setup (and migration) process is just about perfect: The Web Assistant is easy to use and makes NAS setup as easy as typing in a web address and entering some rudimentary information – Gone are the days of fumbling around in your router settings or downloading a standalone setup program!
 Coupled with the easy to navigate DSM, Synology has really gotten NAS setup right.
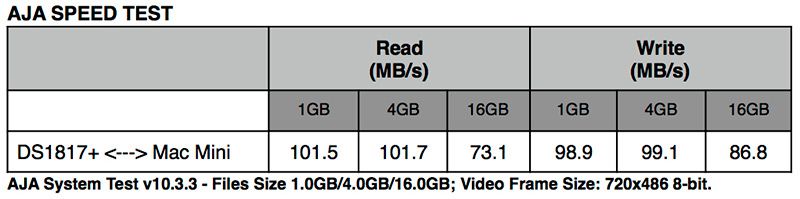
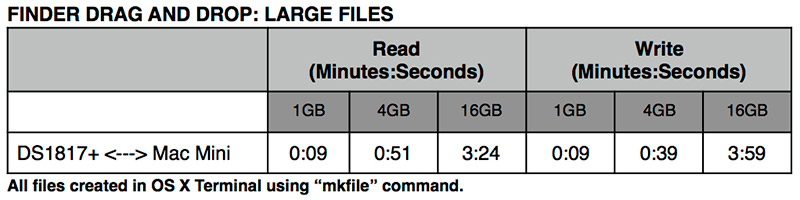
To test the performance of the DS1817+ we ran some standardised tests on a live network which we feel is indicative of how a device will likely work in a real world environment. All testing (including benchmarks) were undertaken on our CAT6 connected local area network. All connections are routed through a domestic Asus DSL-AC68U router, which in turn runs through a 24 port HP Procurve switch.

Beyond pure file transfers, Synology NAS devices do so much more. At the 2016 Melbourne conference it was touted that rather than the usual “Network Attached Storage” nomenclature, at Synology NAS actually stands for “Networking Applications (and) Storage.”
Like all of Synology’s NAS devices, users can install packages to perform various tasks above and beyond simple file sharing. At last count, the Synology Package Centre features over 100 applications available for download to enhance functionality. This includes over sixty third pary applications such as WordPress, PlexMedia Server, Joomla and BitTorrent Sync.
 Beyond this, Synology offers powerful in house applications such as Cloud Sync (for seamless syncing between multiple DiskStations and Public Clouds), PhotoStation (An online photo album where you can easily share photos and videos over the Internet securely) and even their own Spreadsheet, Notes and Calendar applications. And this is just the tip of the Application iceberg!
For a rundown on just what packages are available for the latest DSM which runs on all of Synology’s NAS devices, visit Synology’s DSM add-on packages information page.
Beyond this, via the Virtual Machine Manager (currently still in Beta) Synology have added the ability to easily run virtual machines. We played around with this new feature and installed Ubuntu 17 which worked well with the 16GB RAM installed.
 The DS1817+ connects to networks via its four Gigabit ports allowing for both failover and link aggregation support. Also, an optional 10GbE network card can be installed in the PCIe slot for extra bandwidth. This PCIe slot can also be used to house dual M.2 SSD cards with Synology’s optional M2D17 add-in card.
SELECTED SPECIFICATIONS
CPU: Quad Core Intel Atom 2.4Ghz
Memory: 8GB standard upgradeable to 16GB (as tested)
Drive Bays: 8 + 10 with optional expansion unit
Supported Drive Types: 3.5” SATA HDD and 2.5” SATA HDD and SSD
Maximum Internal Storage: 80TB (8x10TB)
Ports: 4x Gigabit RJ-45, 4x USB 3.0, 2x eSATA
Supported File Systems: Btrfs; EXT4 (Internal) Btrfs; EXT4; EXT3; FAT; NTFS; HFS+; exFAT (External)
Power Consumption: 61.5W (Access; 31.6W Hibernation)
Noise Level: 22.2 dB(A)
RAIDs Supported: Synology Hybrid Raid; JBOD; RAID 0, 1, 5, 6, 10.
Warranty: 3 Years
CONCLUSION
 Coupled with the 180TB storage potential (with expansion units), Synology’s DSM and package centre make the Network Application Storage moniker an accurate one. Like modern (smart) phones, Synology has taken the concept of the NAS and turned it into so much more that it is (quite literally) redefining what a NAS can do.
And just think, with all those terabytes, you could store the entire human race’s data output.. for a few seonds at least!
The 2GB variant of the DS1817+ is available from a variety of IT stores in Australia for just under $1500AUD. The 16GB RAM expansion kit is available for a street price of around $400AUD.
To find out more about the DS1817+ please visit Synology’s product page.
