
 Adding ambient lighting to your home is all the rage and the smart lighting of the Nanoleaf Lines offers a brilliant array of colours with a modern, almost futuristic feel. The Nanoleaf Lines range offers modular backlit smart light bars that connect together in any number of patterns. Tie them into your Smart Home Ecosystem to provide mood lighting, or sync them up to your PC or music to make your room will come alive with your entertainment. With any number of designs, and over 16 million colours and ‘Scenes’, the possibilities are endless.
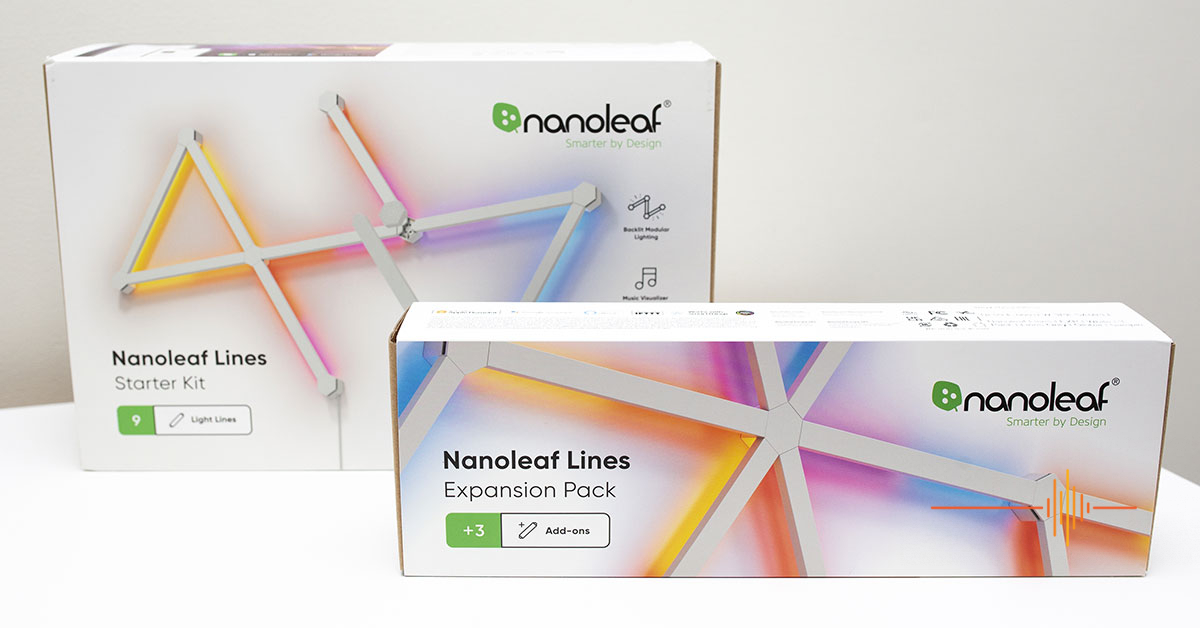
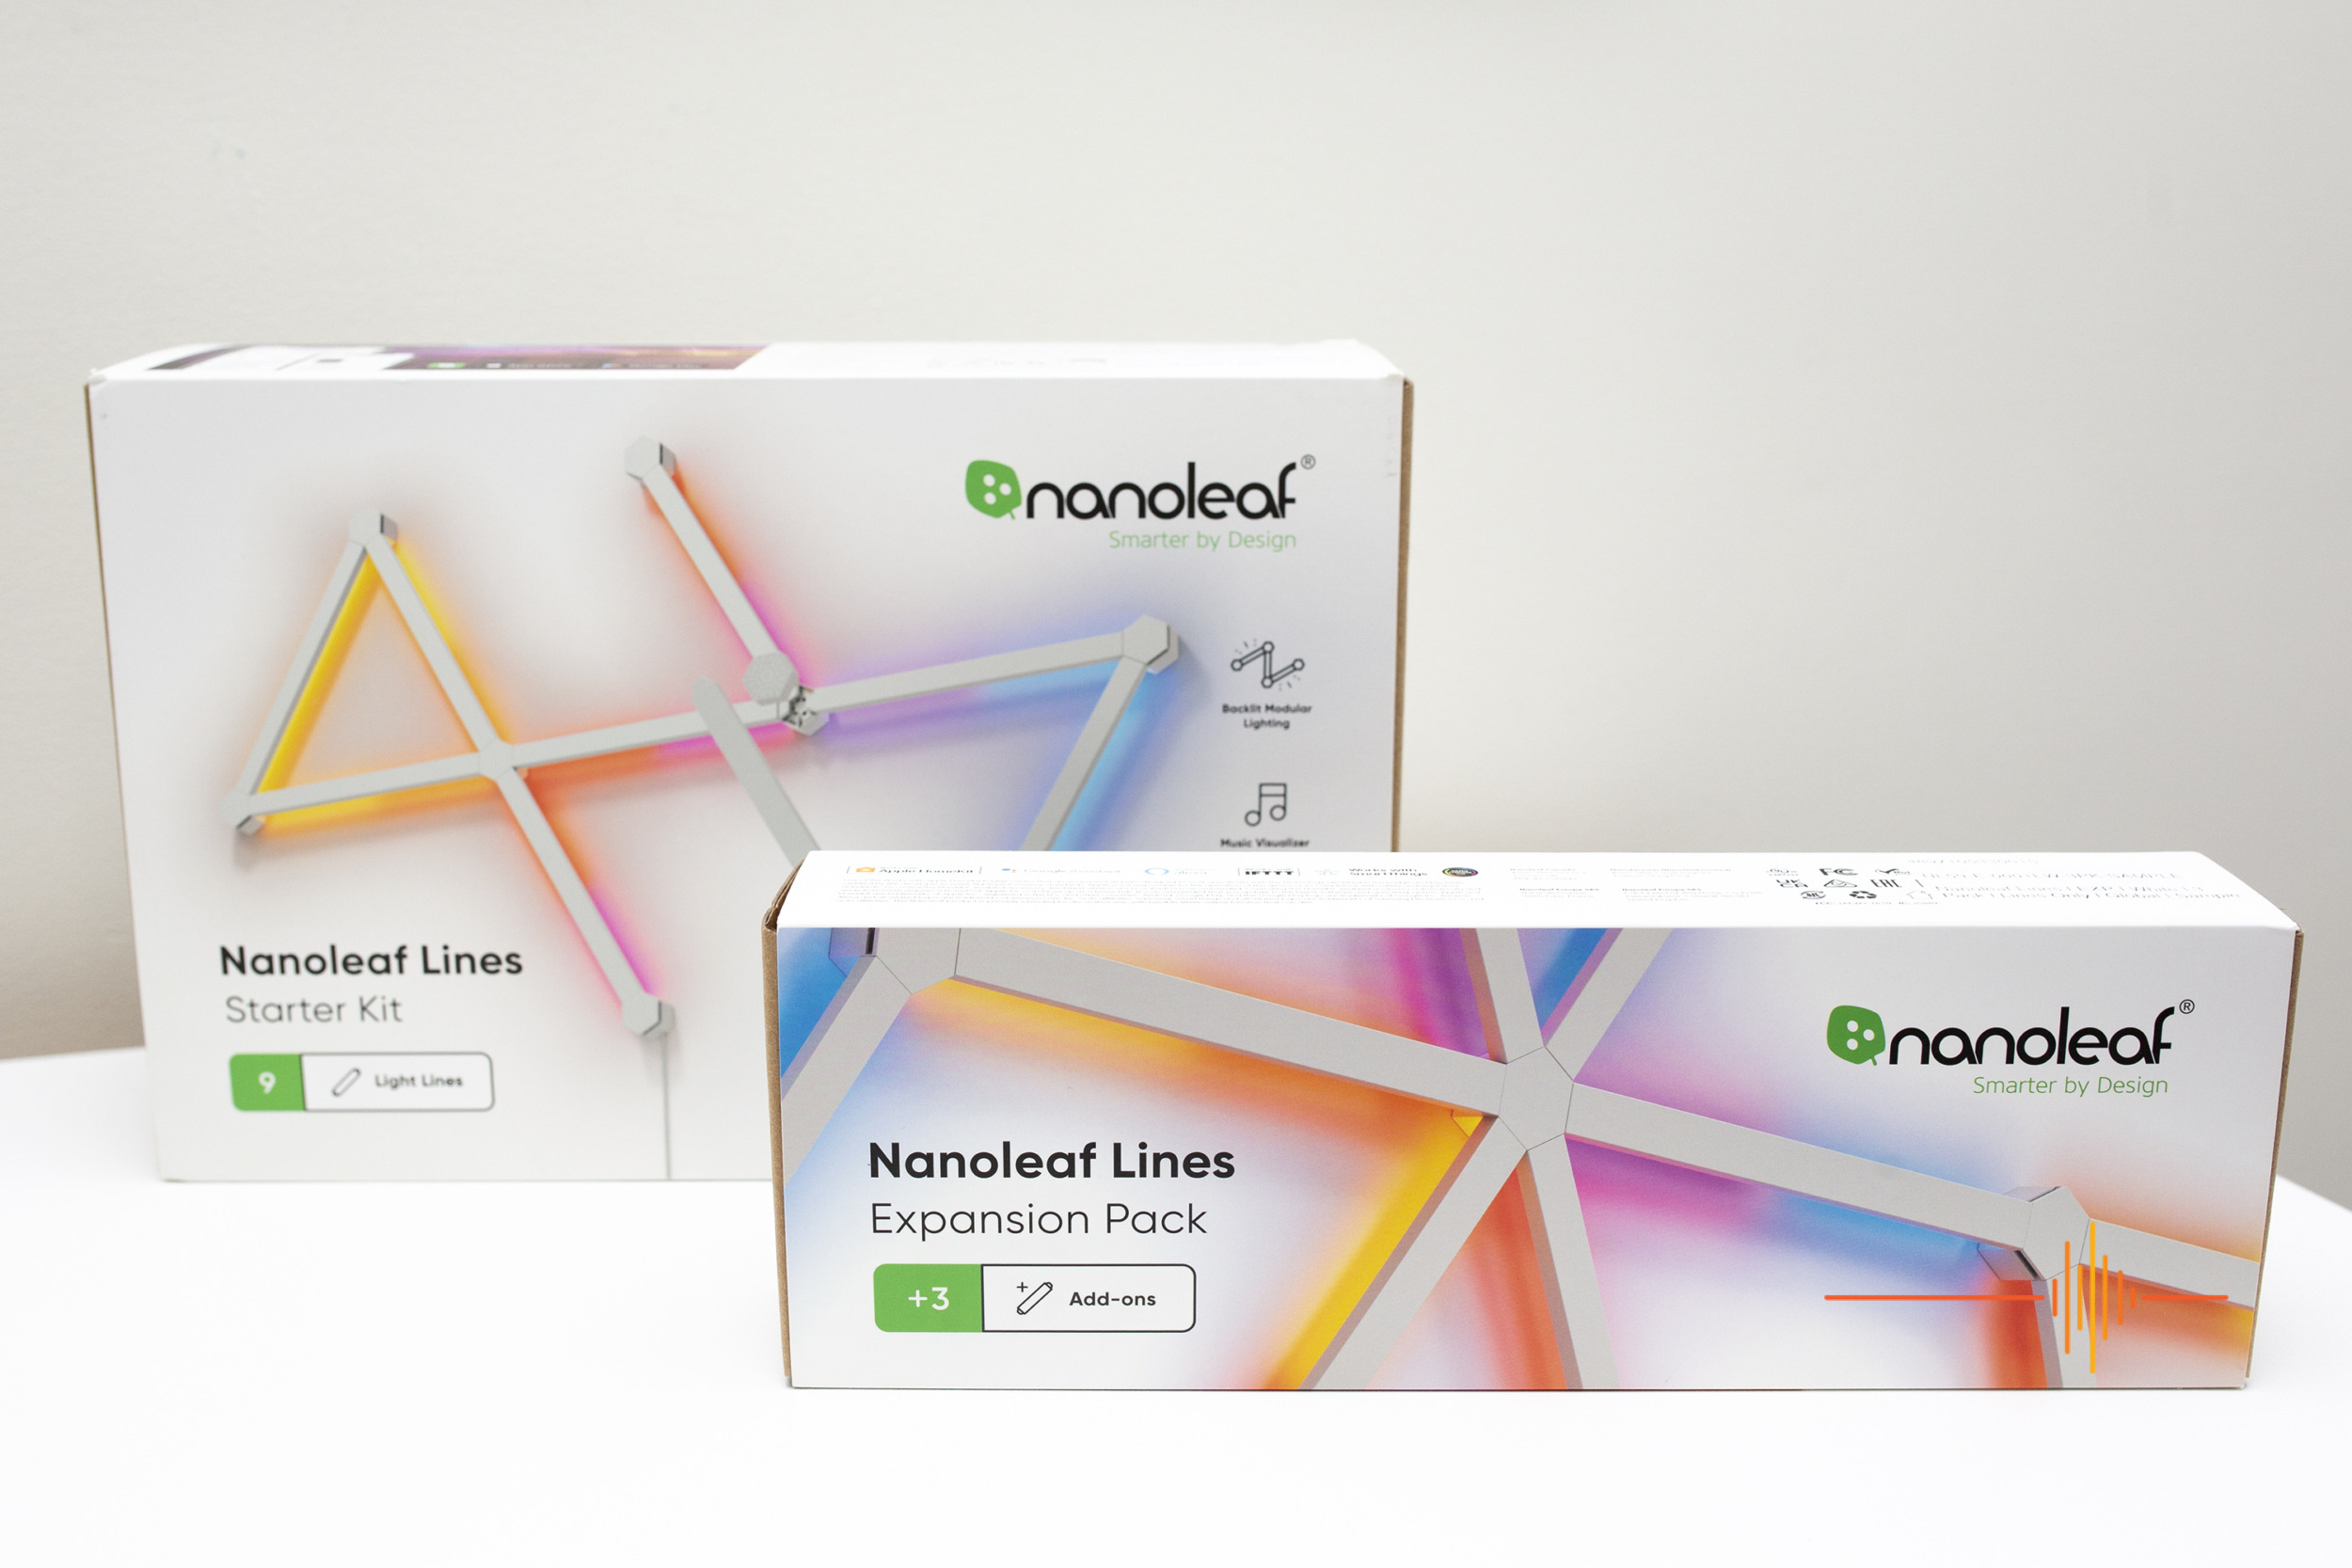
Armed with a 9-bar starter kit and a 3-bar expansion pack, I set about finding the right place for these lights. And, to be honest, in my house it was no easy task due to some in progress renovations. But I do love the spot I found.
What’s in the box with Nanoleaf Lines
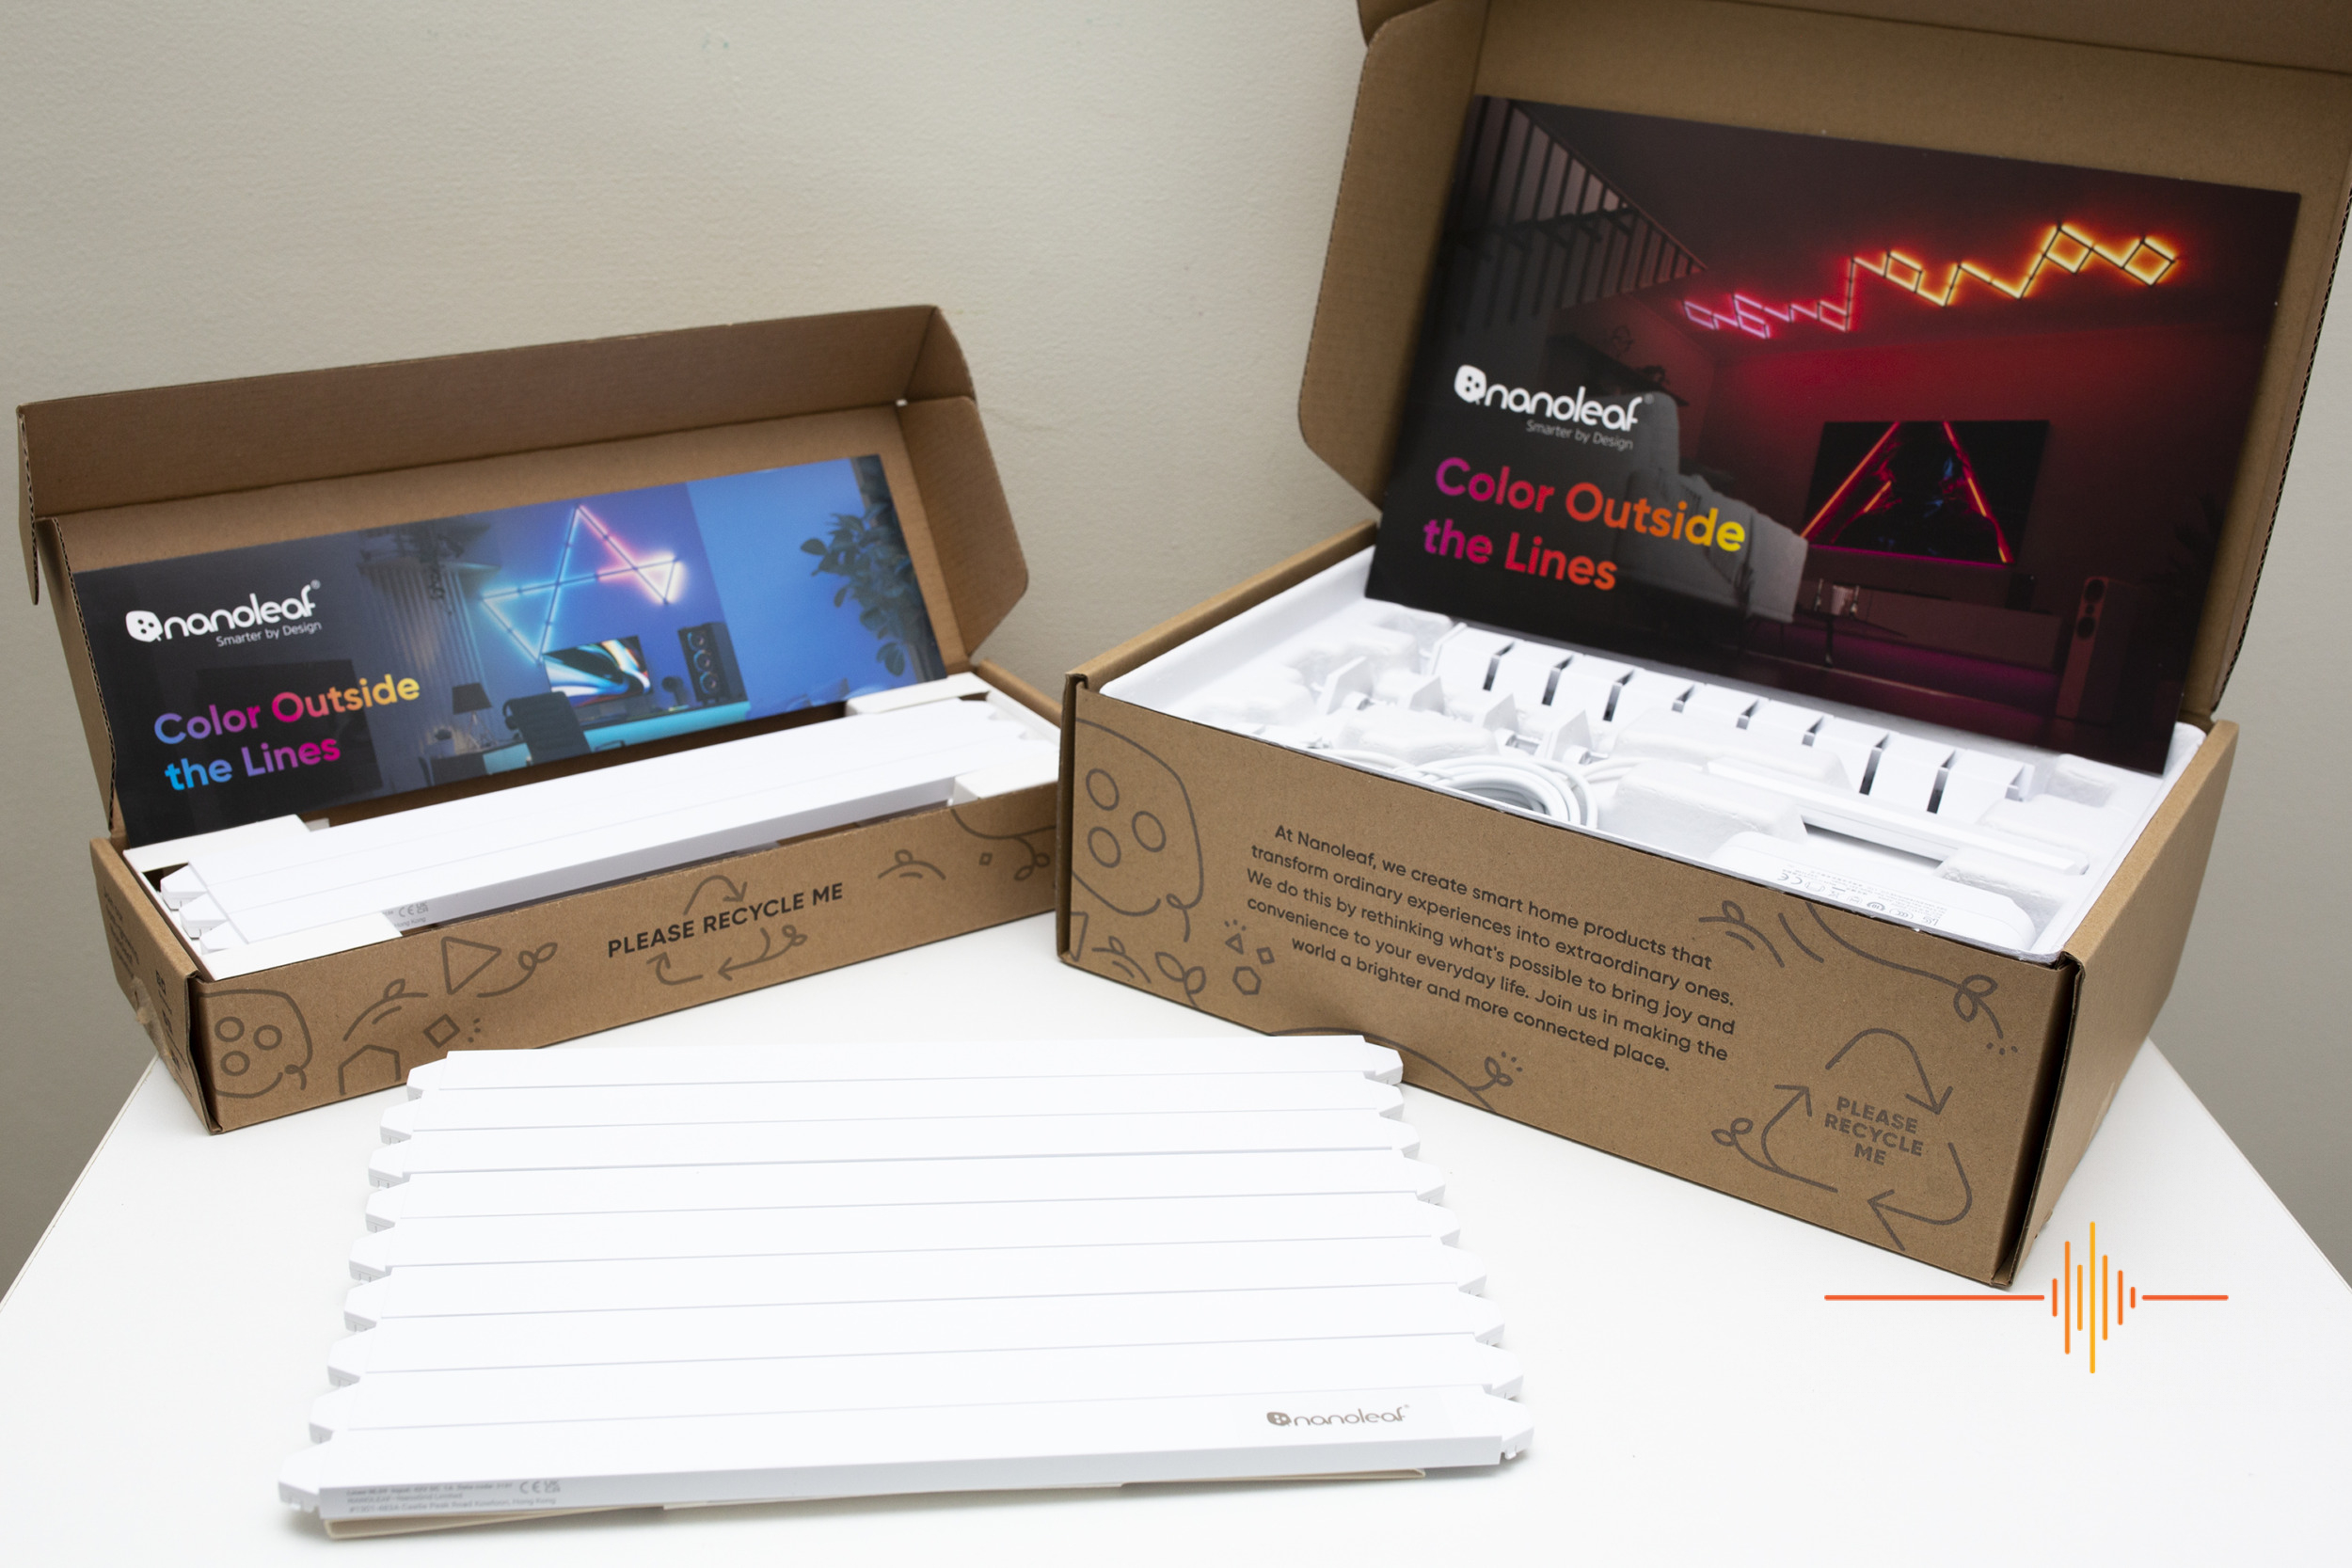
First thing I will say, the Nanoleaf Lines are packed so incredibly well. Take off the outside branding, and a simple brown box awaits. Open it, and a glossy one pager provides you some design inspiration along with QR codes to find your tutorials, warranty, iOS or Android Apps, and the store to buy expansion packs. And then we get to the good stuff.
Atop is a tray of the 9 lines, presented neatly. Lifting that out, everything else you need is tucked away within. Each line plugs into what I am calling a Hex Connector. Within the starter kit, there is the Control Hex Connector (which is used to run power to the Lines, but also has basic controls on it) as well as the power cable. In addition, there is 9 Hex Connectors and cover caps. This means, if you wish, you can just run your lines end to end with a Hex Connector at the end of and between each line.
The 3-Line Expansion Pack includes the three more lines along with three more Hex Connectors, and features, again, a glossy card with some further design inspirations with 12, 15 and 18 lines.
Designing your Nanoleaf Lines design
 Here comes your biggest headache. And it is in no means related to actually piecing the Nanoleaf Lines together.
No, your biggest headache will be coming up with a design. What are will add to your room’s style? Zig zags or a straight line? A radioactive symbol? Something obtuse? Open-ended shapes, triangles or hexagons or any number of combinations? There are countless combinations limited only by the number of lines you have. The App does have a feature that you can use to randomise designs and show them in your room, but more on that later.
One thing I discovered during this is I could never get a tattoo as I suffered so much indecision in my design.
In the end, my design I made for the symmetry, as my design is currently only temporarily mounted so wanted balance. I will likely change the design when I mount it after finishing my renovations.
Building your Nanoleaf Lines display and mounting
 So you have your design in mind that you want to build? Tops!
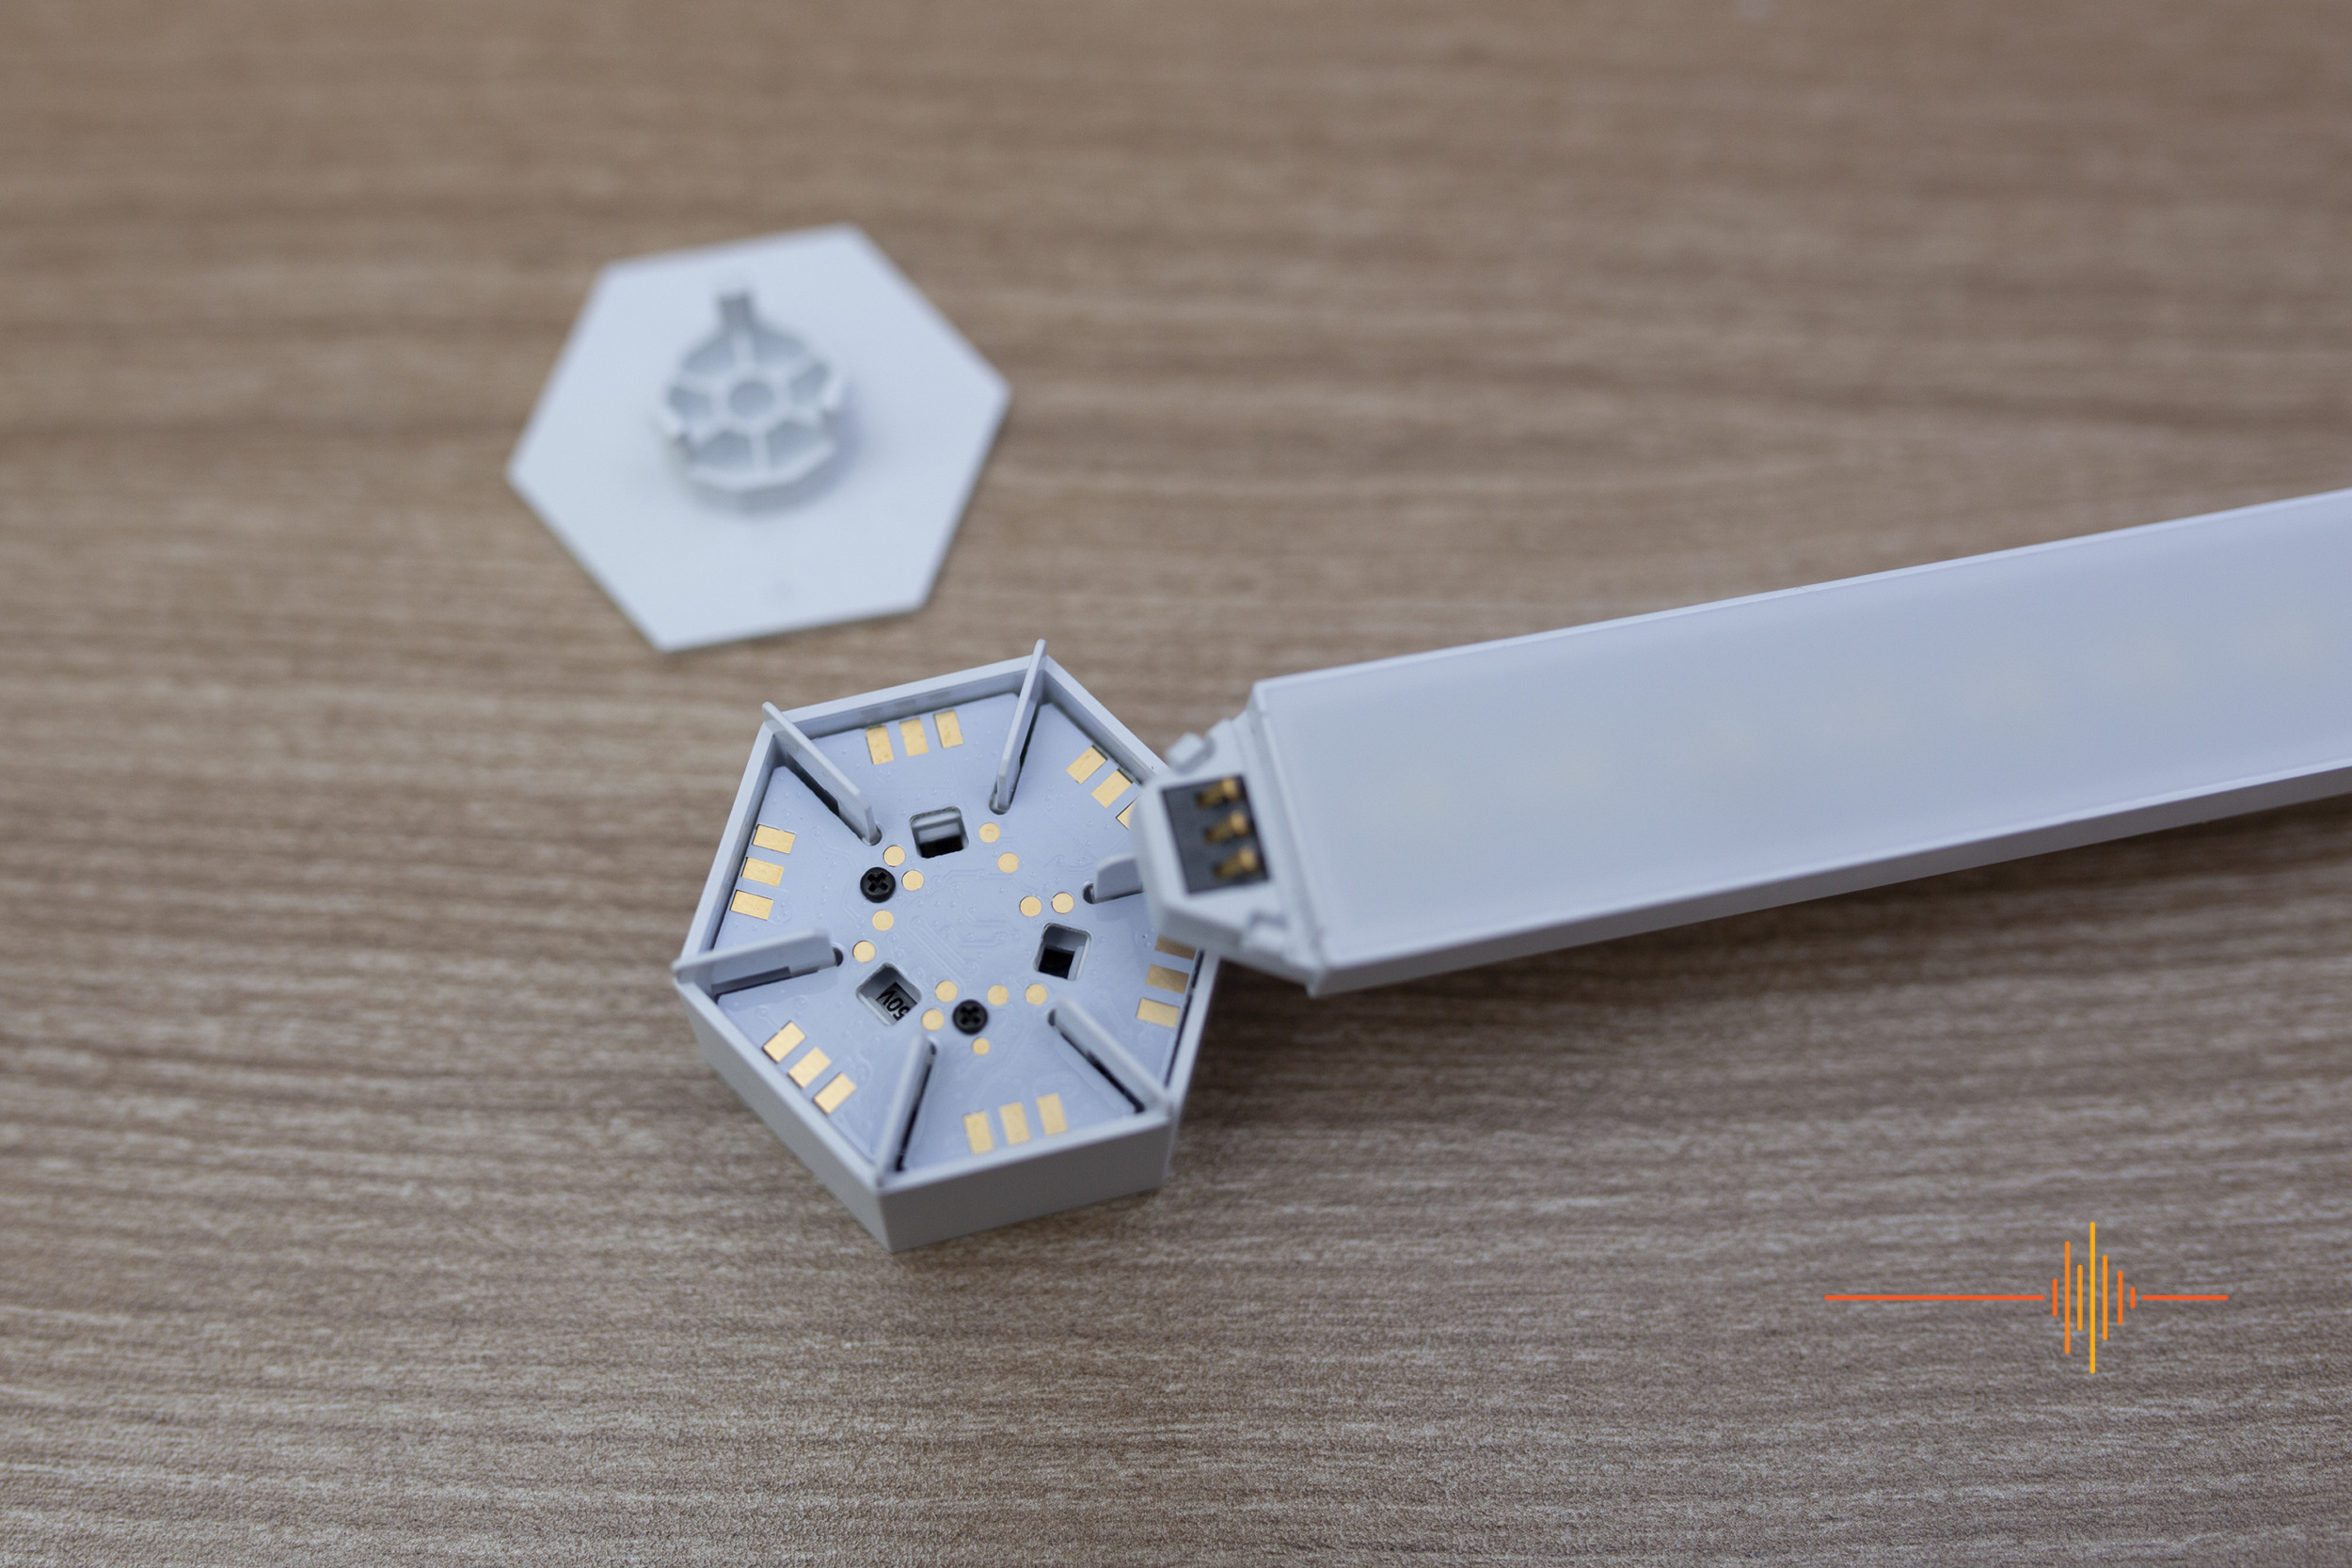
Each Hex Connector allows up to six Lines to be connected to it. With the cover plate removed, the Line slides and clicks into place in the clear to see groove. Once in place, simply click the cover plate into place. Every Line needs a Hex Connector on each end (regardless of it connecting to another piece or being an end piece), but there are plenty of Hex Connectors to go around.
It is recommended you lay out your design on a table first up and get a lay of the land for your design. Piece together the first couple of pieces or a small shape that will be at the top of your design. Then mount it to the wall. Each Hex Connector has a sticky pad on the back. Peel off the tape, and press it against the wall firmly. And then build the rest of your design on the wall. Simples. But, naturally, that first mounting is crucial to get right.
The sticky pads used to mount can be removed. If you pull the Hex Connector off the wall, it will leave a small part, which will let you pull a tab to pull the rest of it off the wall (similar to those removable 3M hooks). I did not try this, but I have heard it can be a bit of a paint peeling experience if your paint work isn’t good.
There’s also an option to screw mount each of the Hex Connectors, for which there’s instructions provided on Nanoleaf’s website. This is particularly needed if you’re mounting your Nanoleaf Lines to your ceiling, be they cathedral or standard ceiling. But the Lines do look great up there from photos I have seen!
The last thing you need to keep in mind is just that Control Hex Connector. It’s the one with the buttons, but also the one with the cord that will go to the power outlet. Just make sure you have that Control Hex Connector toward the bottom of your design. Last thing you want is the power cord running from top to bottom!
All in all, it took me about 30 minutes to set up. It was really easy and easily modifiable (unless you’ve stuck your Hex Connectors to the wall already).
On that power cord, this is the biggest issue…
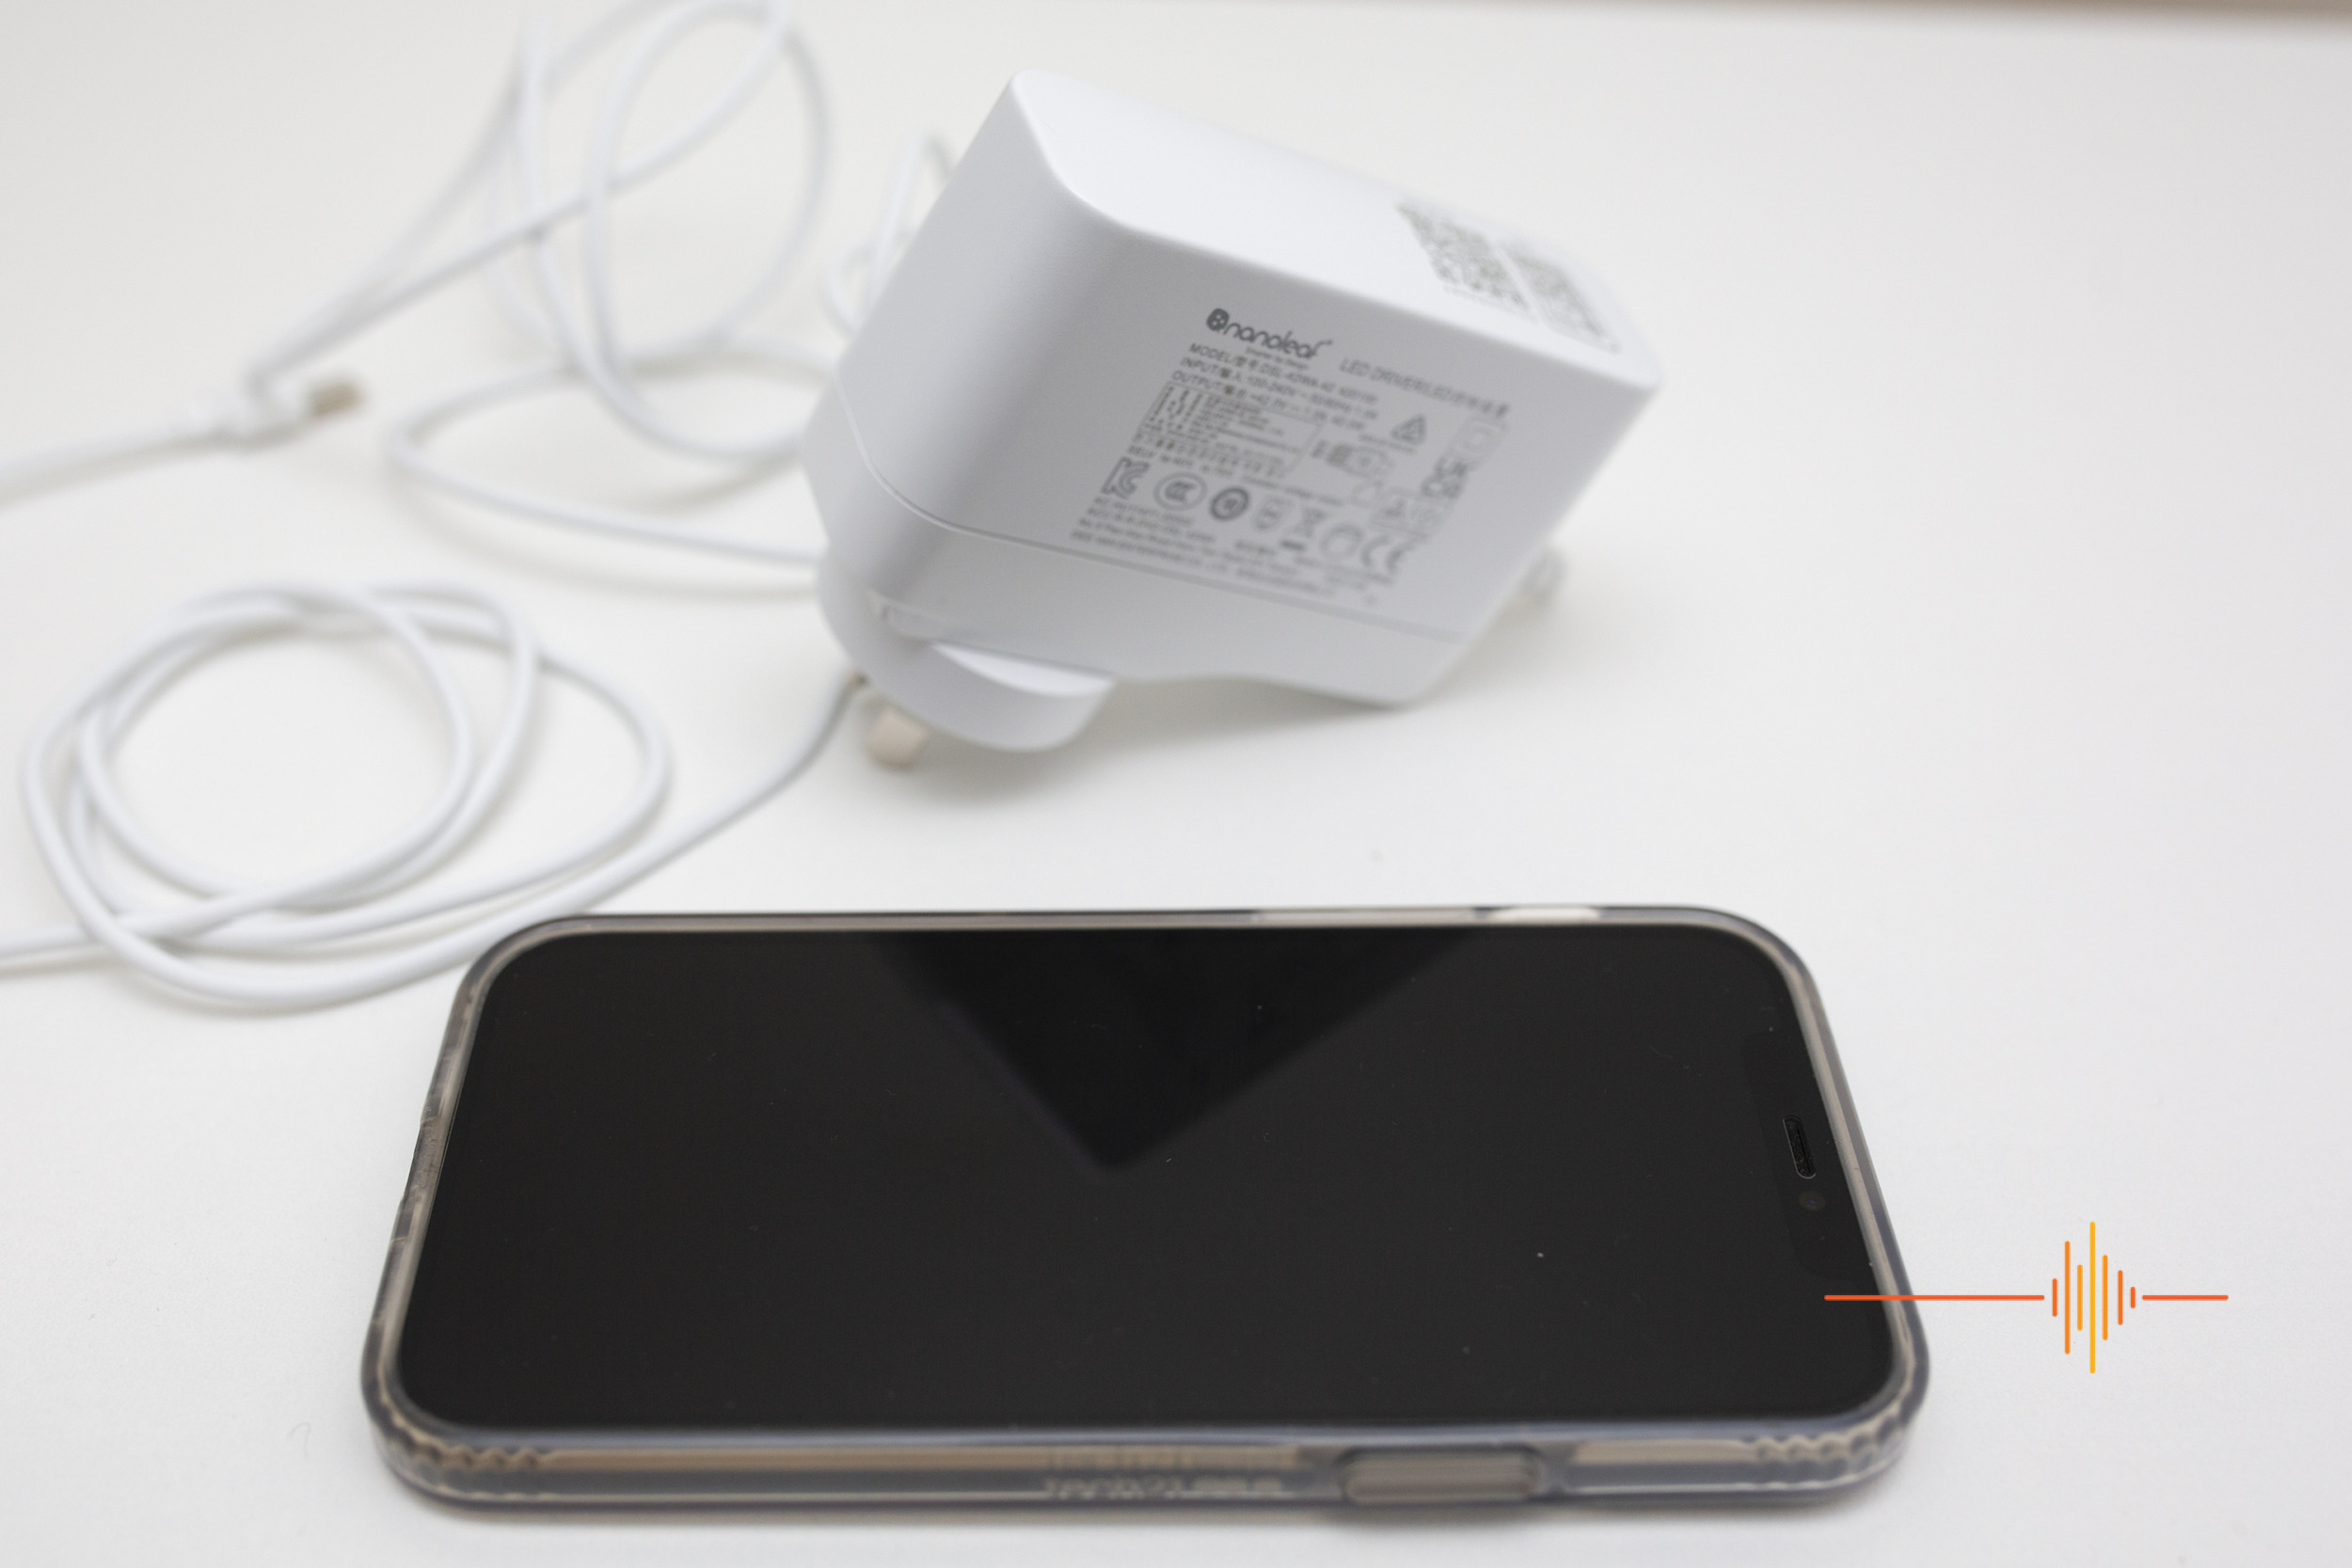 Naturally there needs to be a power cord. You can’t have lights without power. And the Control Hex Connector is okay; on top of the Connector are your basic controls to turn it on/off, increase brightness, change the mode, etc. Coming from the bottom, the power cord runs out the bottom of it down to a long, thin device I will call the power stick. You then have your power brick with another cord and connection that also plugs into the power stick.
At this point, you’re probably asking what the issue is.
There is a good two metres of cord between the Control Hex Connector and the power stick. There is also a solid three metres plus of cord between the power brick and the end plug. This can be good, depending on where you mount your Nanoleaf Lines. But it also means you have to have somewhere you can ‘hide’ a lot of cord.
In addition, that power brick? It is massive. For comparison, there is the power brick alongside my iPhone 12. It is a beast of a power brick and since it has a proprietary power connection.
For me, I intended on originally putting the lights in my entertainment room on an exposed wall which also acts as a walkway. There is a power point under where I would mount it. But I would kick the power brick as it sticks out the wall significantly, and there is nowhere to safely stash the cabling. You really need to mount your design above a desk or cabinet or table where you can do some creative (or messy) cable management.
The Nanoleaf App and connecting the Nanoleaf Lines: Two tales within one app!
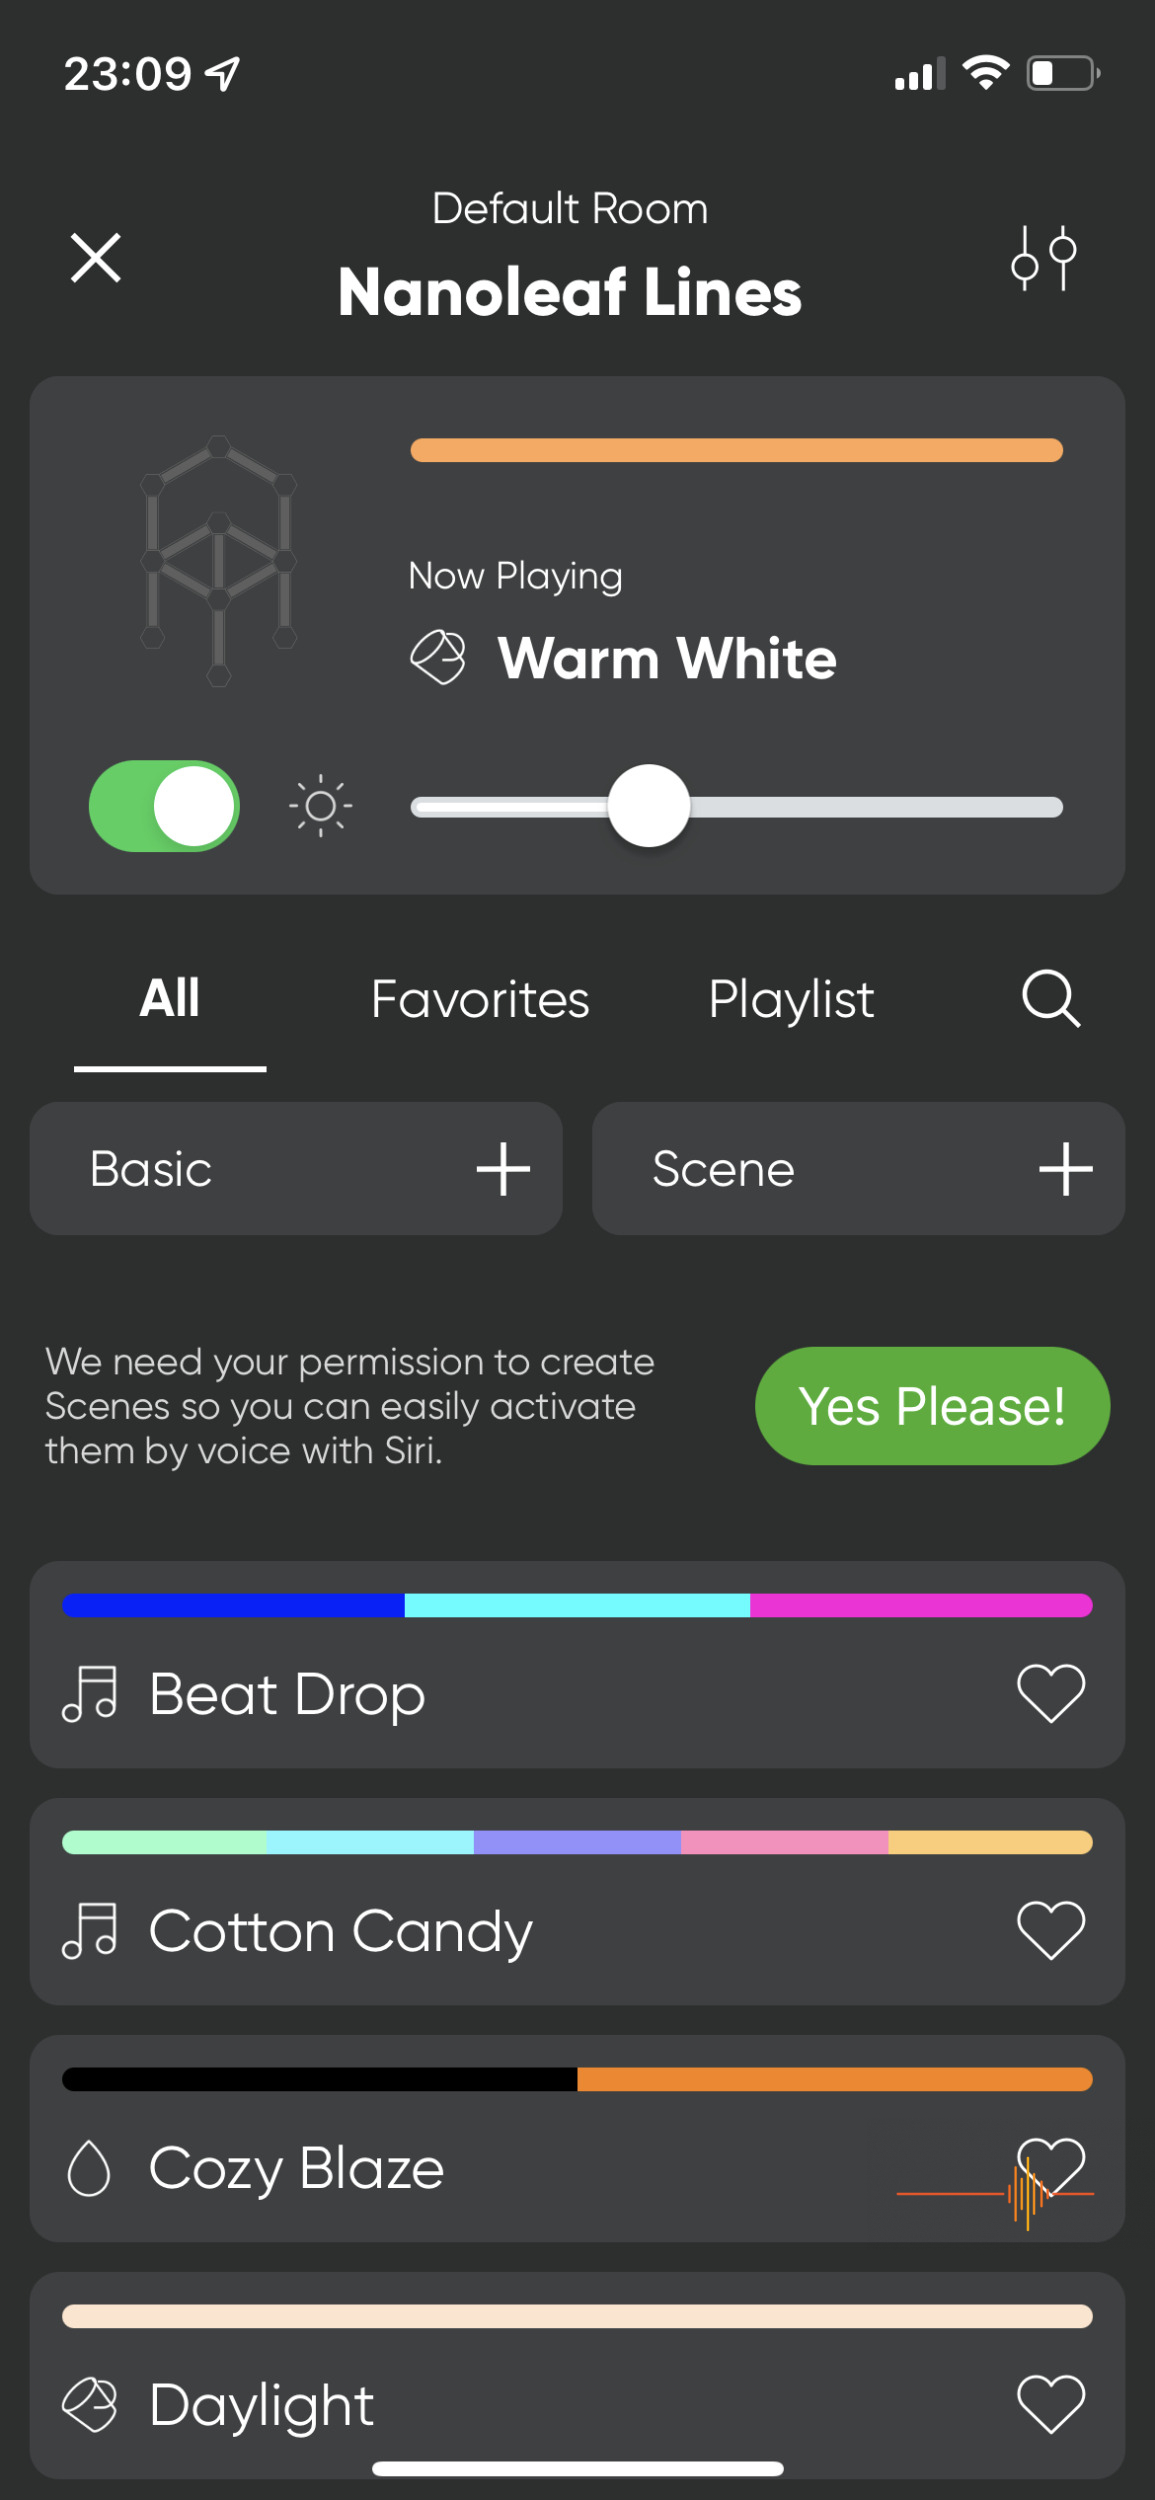 I grabbed the iOS App a while back. You need to create an account, but that’s pretty standard for smart devices. The App promises a Layout Assistant, which offers the ability to build your design (put in the number of Lines you have and hit shuffle and modify as you need). After that, you can use augmented reality mode using your phone’s camera to see what it would look like in your room. This is a hidden feature of the App. I personally think it should be removed, as I have never had a more clunky experience before.
Connecting the Nanoleaf Lines, however, is by far the best experience I have ever had with smart devices.
Hit add new device.
Hold my phone (which I note was connected to my 5Ghz band on my wifi) next to the power stick for a moment.
Done.
I kid you not, it was so easy, I deleted the device to do it again to make sure I wasn’t missing something.
Compared to how I have argued and fought with some other smart devices in the past, Nanoleaf smash this process out of the park.
From there, syncing to Google Home to add to my Smart Home Ecosystem was the standard process of linking my Nanoleaf account to Google, and now I can control my lights by Google commands. It also ties into my phone easily so I can use Siri to control it. And, if you’re running Alexa, it works with that, too. Really versatile, and really responsive to any of those voice commands. I think Nanoleaf’s services connect and communicate to Google commands by far the best of any smart devices I’ve used. Really snappy.
Shining, Shimmering, Brilliant
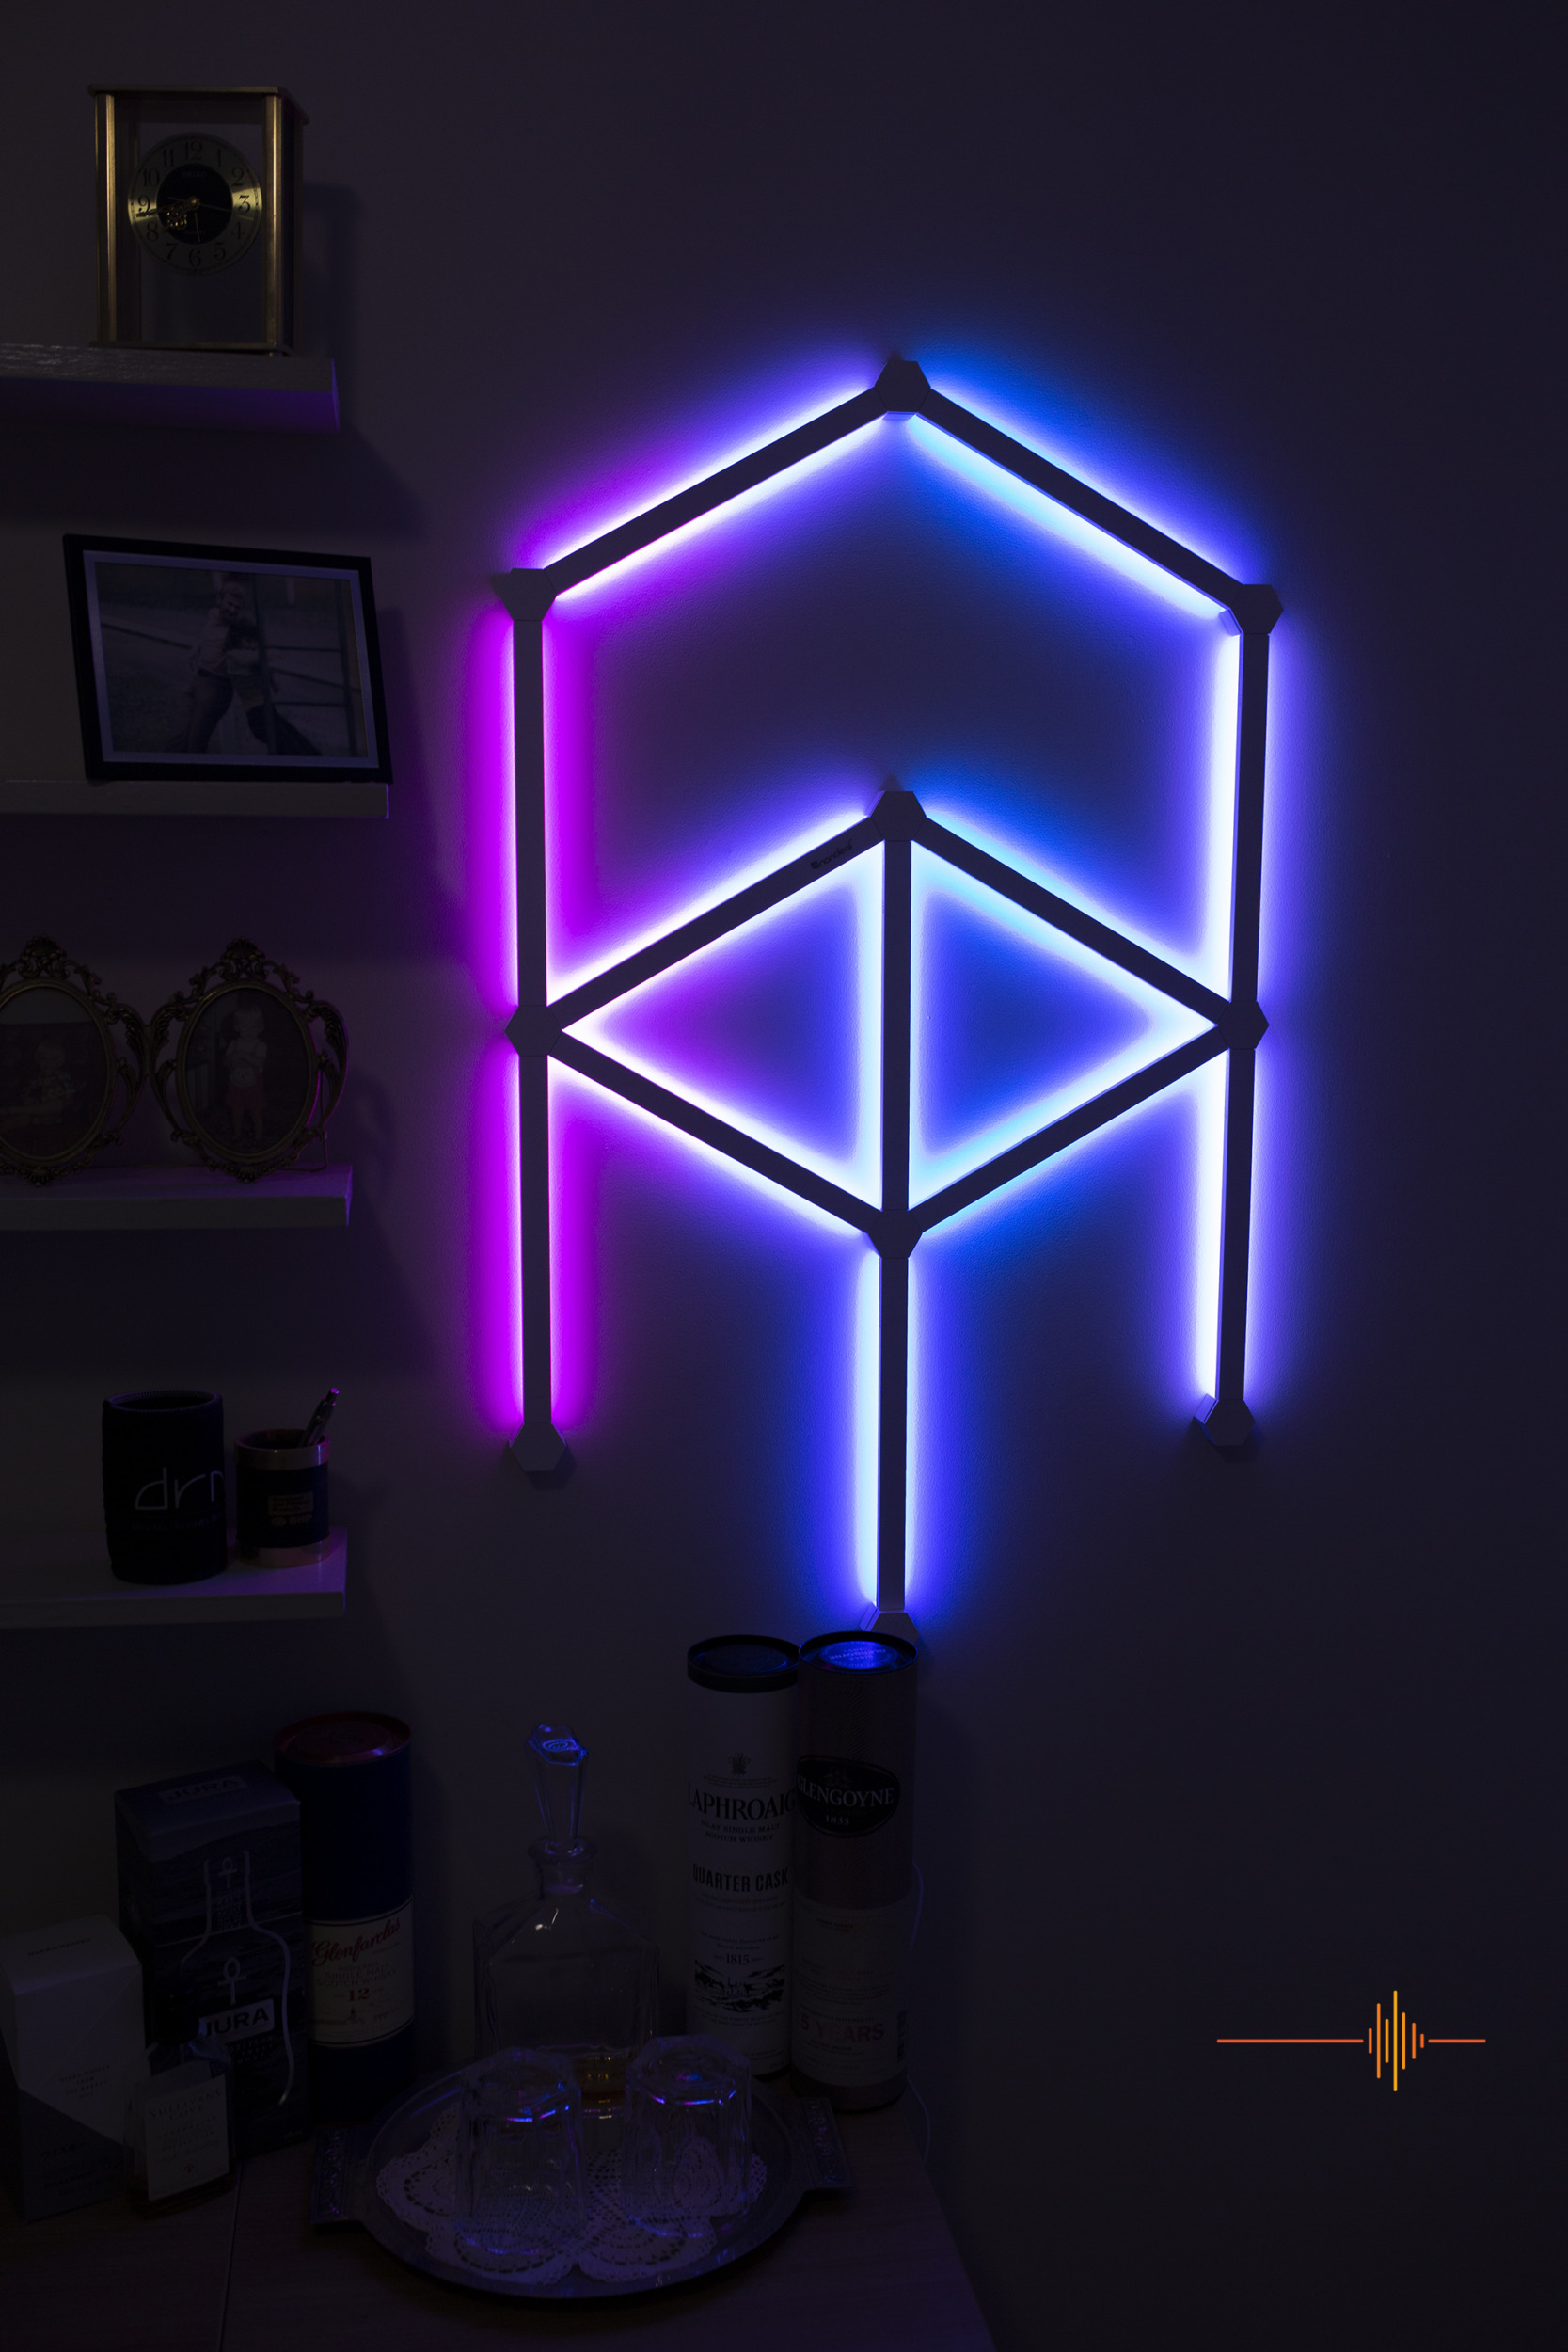
There is not too much to say here. Other than they look great. And photos / videos probably don’t do them justice. At full power, they are BRIGHT. At 100% in white, they light my office as much as the ceiling light. Even at 100% brightness, the colours are rich and gorgeous.
At a lower brightness level, they offer a beautifully soft ambience. Either a touch of colour or a lovely warm white to add mood. While the design might suit a more modern style home, the light they throw is gorgeous and I love the feel it adds to the room.
I will also add that these run relatively cool. At 100% colour for 20 minutes, the lights were barely warm.
Sync for music
I will leave the video do the talking, but you do have a number of scenes that tie to music. Naturally, your design will have a big impact on how good the Scene will look, as will the colours in the Scene, but it can be nice to get some beats going and get the lights flashing like mad. Similarly, a bit of ambient music to go with soft ambient light ebbing and flowing can add quite a mood to the room. It’s not a perfect sync, but it works pretty well.
Sync to PC for screen mirroring
It’s worth noting there is also the PC program. I installed it, signed in with my existing account, and my Lines there ready to go. There are lots of lighting scenes to choose from in here, possibly more than the iOS App, but a few other added abilities. Both the App and PC program allow schedules and ability to design your own Scenes (i.e. how colours show). But the PC program also has the added ability to enable screen mirroring. Screen mirroring allows you to choose a monitor, and the Lines will mimic what’s going on on screen with the lines in one of four modes. This will include whether you’re watching a movie or playing video games.
Again, will leave the video do the talking. Naturally, your design has a massive part to play with this. A design that ‘fills’ and covers all corners of your screen in the App will best mimic the colours and lights on screen. Explosions in games or movies will reflect and create ambience for you. A very cool feature. (Enjoy my voice…)
Adding Nanoleaf Lines to your life
The Nanoleaf Lines are superb in what they offer. They provide brilliant colours, gorgeous ambient light, and some cool functionality. But they are not for anyone. They definitely suit a particular aesthetic; if you have a modern, contemporary or minimalist style in your house, these will fit perfectly with your look. In an older, more traditional house like mine, they may not be perfect (as opposed to the Nanoleaf Elements that Kevin reviewed last year). However, with their flexibility of what you design, you can make these work for you.
It is worth noting that the Nanoleaf Lines Smarter Kit (9 Lines) starter kit is currently AU$249 on Amazon, with the 3 Line Expansion kit going for AU$119. Alternatively, there is also a 15 Pack starter kit that retails for AU$542 on Amazon. These aren’t exactly cheap. But they do look great, especially if you sync it up to your computer for a more immersive gaming and entertainment option. But it just depends on the size of the design you want as to how much it will set you back.
However, if these are something you like the look of and it suits your style, these are an awesome product. So, consider grabbing a kit and illuminating your room with Nanoleaf Lines.
Thank you to Nanoleaf for providing me a kit to trial and review.

